


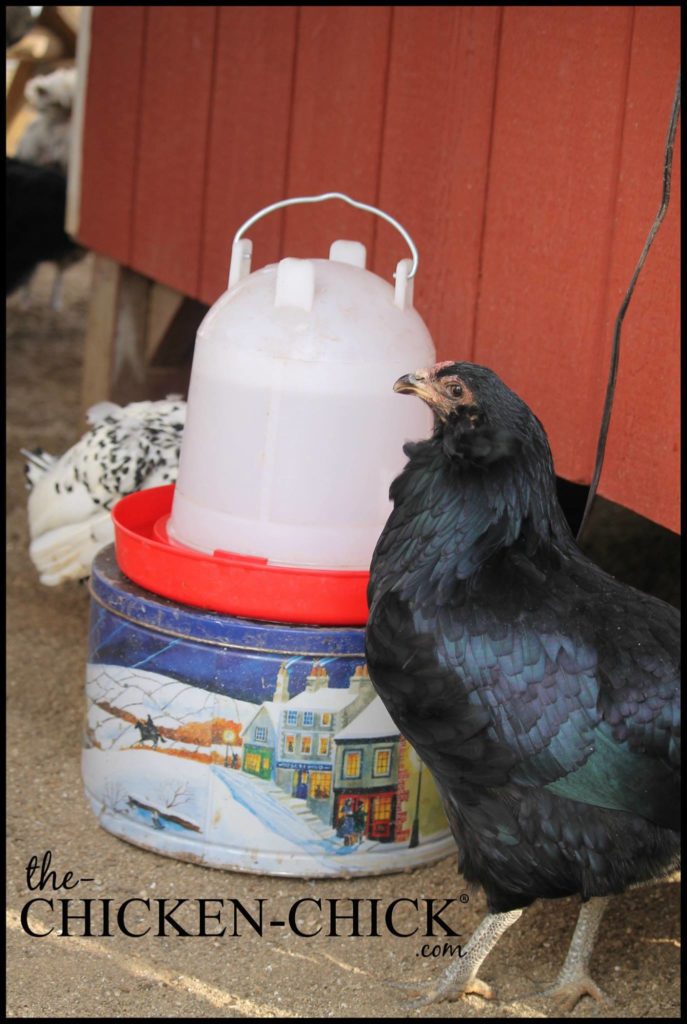
Winter brings many challenges for the backyard chicken-keeper, and frozen water is chief among them. You can make your own waterer heater for use with either metal or plastic waterers. It will cost less than $10, cost pennies to run and you can complete the project in under ten minutes! 
We had record-breaking, sub-zero temperatures for long periods of time in 2010 here in Connectictut and my waterers never iced over the way they used to without these heaters. It doesn’t seem as though a humble, 40 watt lightbulb should be able to produce enough warmth to keep the water in a plastic waterer from icing over, but remarkably, it does!
Supplies:
-
10″, metal cookie tin (available at most dollar & thrift stores & likely in your garage or basement)
-
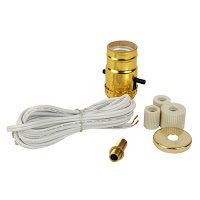
lamp assembly kit (available oniline, at hardware & home improvement stores OR buy a thrift store/tag sale lamp and take it apart)0
- 40 watt, incandescent light bulb (in deep-freeze conditions, use a 60 watt bulb)(in light of the government phase-out, some users recommend 40 watt candelabra bulbs or CFL bulbs, but I have not, so I cannot vouch for their effectiveness)
- Drill with 3/8″ drill bit
INSTRUCTIONS:
1. Drill a hole in the side of the cookie tin.
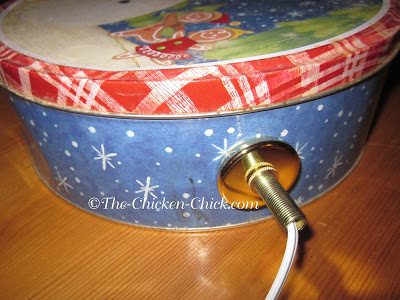
2. String the pre-threaded lamp stem assembly through the hole & tighten the screw on the stem.
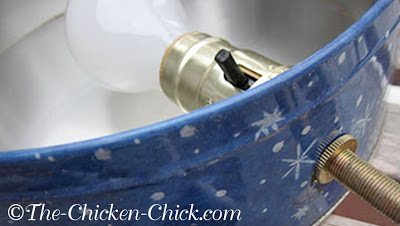
3. Screw in the light bulb. Voila!
TO USE:
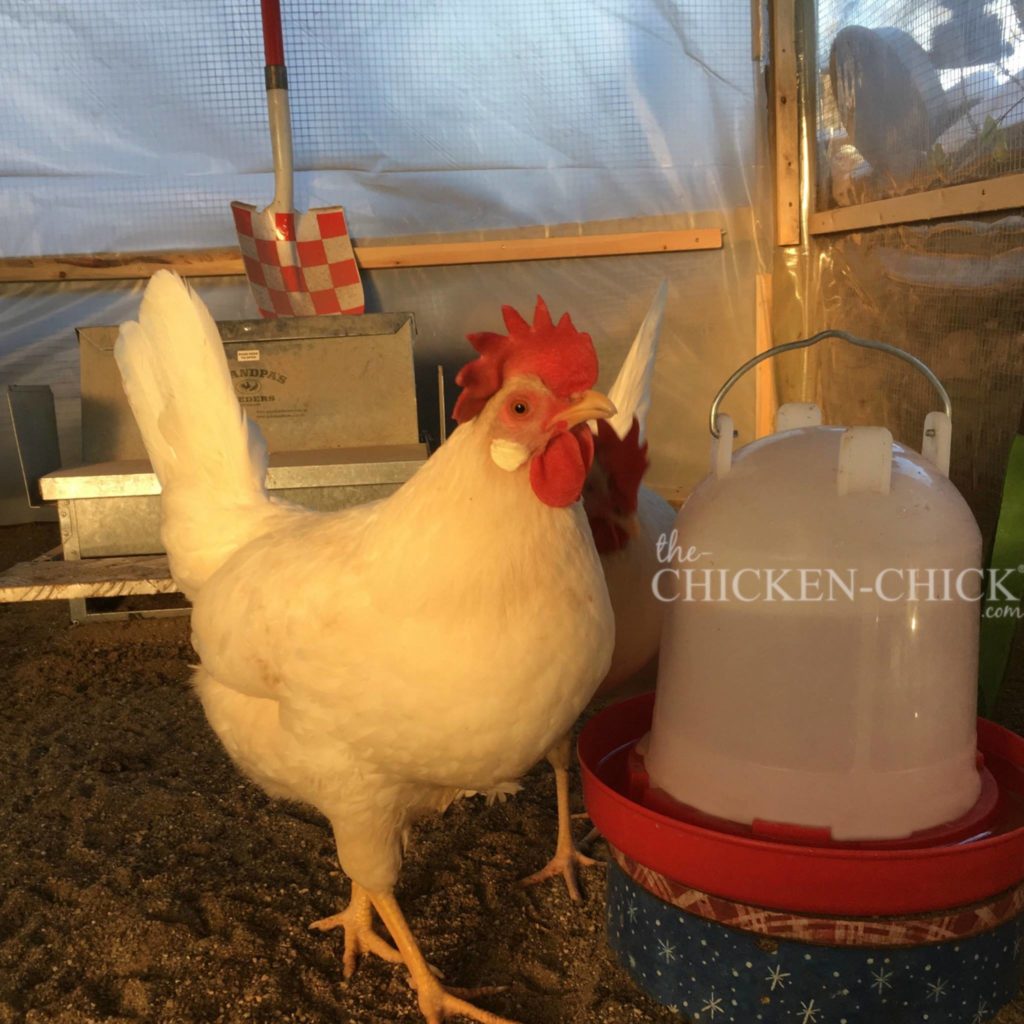
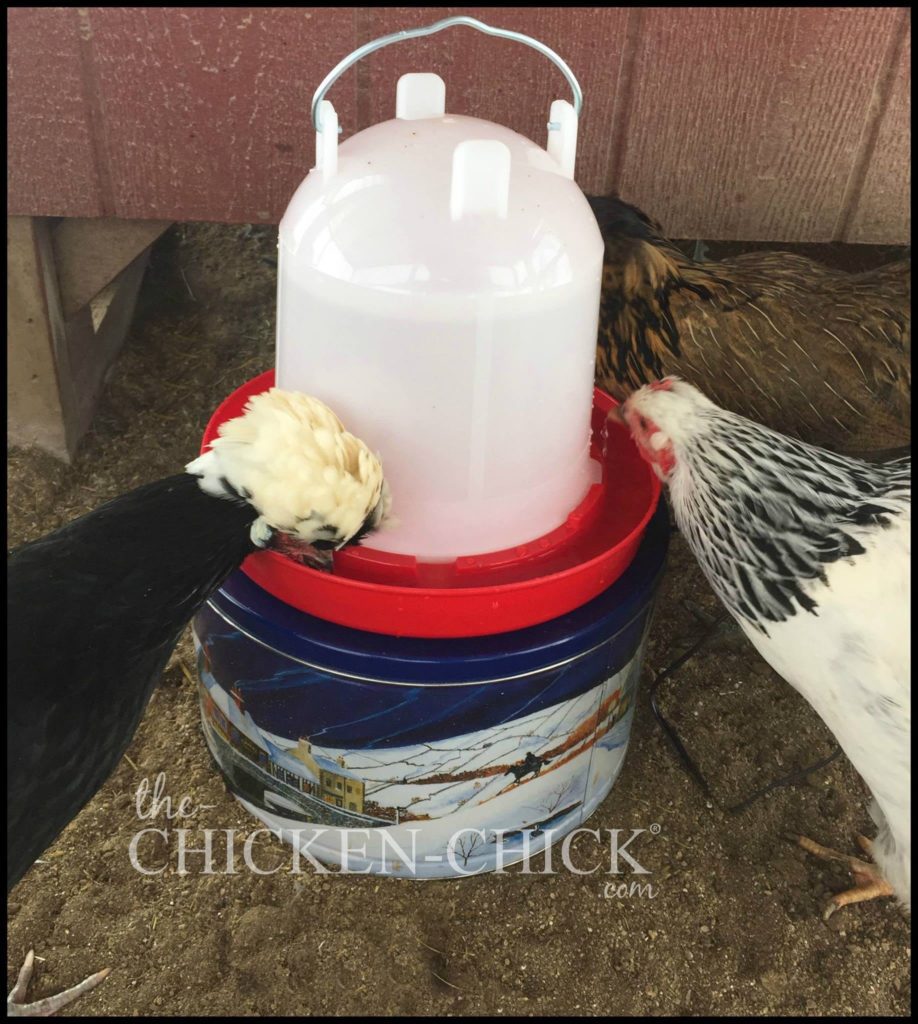
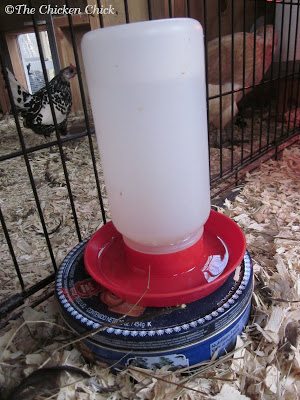
Put the top on the cookie tin and place the tin on a cinder block or another level surface in the chicken run. Plug into a GFI outlet. Place metal or plastic waterer on top of the water heater when freezing temperatures are anticipated. Disconnect when not in use or use a ThermoCube to turn the unit on when temperatures reache 35°F.
When I made my first cookie tin water heater, I found it difficult to believe that this device, which barely felt warm to the touch, could possibly do the intended job. I was only convinced the first frigid morning I went out into the run and found no ice ring to chip out of the waterer. You may have to try it to believe it too.

Kathy Shea Mormino
Affectionately known internationally as The Chicken Chick®, Kathy Shea Mormino shares a fun-loving, informative style to raising backyard chickens. …Read on


shop my SPONSORS


Winter brings many challenges for the backyard chicken-keeper, and frozen water is chief among them. You can make your own waterer heater for use with either metal or plastic waterers. It will cost less than $10, cost pennies to run and you can complete the project in under ten minutes!
We had record-breaking, sub-zero temperatures for long periods of time in 2010 here in Connectictut and my waterers never iced over the way they used to without these heaters. It doesn’t seem as though a humble, 40 watt lightbulb should be able to produce enough warmth to keep the water in a plastic waterer from icing over, but remarkably, it does!
Supplies:
-
10″, metal cookie tin (available at most dollar & thrift stores & likely in your garage or basement)
-
lamp assembly kit (available oniline, at hardware & home improvement stores OR buy a thrift store/tag sale lamp and take it apart)0
- 40 watt, incandescent light bulb (in deep-freeze conditions, use a 60 watt bulb)(in light of the government phase-out, some users recommend 40 watt candelabra bulbs or CFL bulbs, but I have not, so I cannot vouch for their effectiveness)
- Drill with 3/8″ drill bit
INSTRUCTIONS:
1. Drill a hole in the side of the cookie tin.
2. String the pre-threaded lamp stem assembly through the hole & tighten the screw on the stem.
3. Screw in the light bulb. Voila!
TO USE:
Put the top on the cookie tin and place the tin on a cinder block or another level surface in the chicken run. Plug into a GFI outlet. Place metal or plastic waterer on top of the water heater when freezing temperatures are anticipated. Disconnect when not in use or use a ThermoCube to turn the unit on when temperatures reache 35°F.
When I made my first cookie tin water heater, I found it difficult to believe that this device, which barely felt warm to the touch, could possibly do the intended job. I was only convinced the first frigid morning I went out into the run and found no ice ring to chip out of the waterer. You may have to try it to believe it too.


I'll have to show Hubby this one! Great idea! Wish I'd had seen this BEFORE I bought the $35. one at the feed store! This is such a great invention!
So sorry to hear about your friend's coop. Electricity is our friend when used responsibly and can be our worst enemy if not, regardless of the wattage.
Safety first folks. Safety first!
I bought a seed germintaion mat, that is waterproof, exteremely low wattage and have used it for years with my birds. I had a friend who had a coop burn down because of a light bulb heater
Thanks Jeff. No official tests done but there were record breaking cold temperatures here in Connecticut last year and the chickens could always access the water even if a thin layer of ice had begun to form overnight.
Very neat idea. Any tests done to see how cold it can get and this method still work?
Jeff
http://www.thebackyardchickencoop.com