


My husband rolls his eyes whenever I say I’m taking a trip to the town landfill. “Don’t come back with anything,” are the traditional parting words. He knows a drop-off is never my primary purpose; I visit the landfill mainly to check “Treasure Central,” also known as the reclamation center. Used items with plenty of life left in them await their new owners in Treasure Central and there’s no telling when one might hit the mother load. Go early and often, that’s my motto. 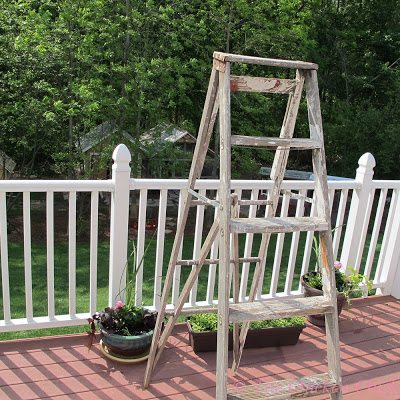
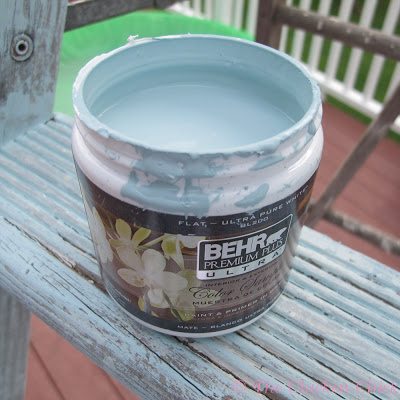
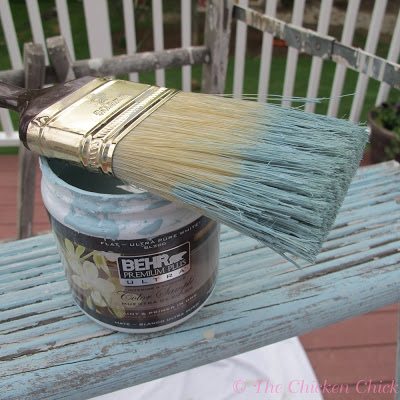
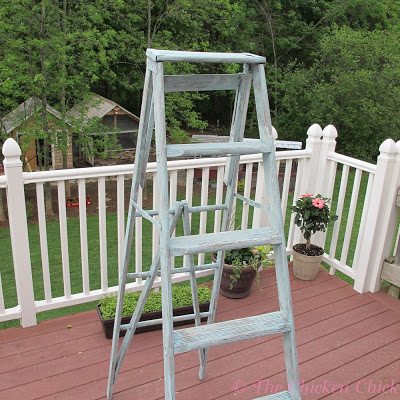
I lucked into a tired-looking ladder with its tag sale sticker still on it- a paltry five dollars was the asking price for this diamond in the rough. I had a plan for it before the trunk of my Volkswagen Jetta was open.The ladder was in brilliant condition and could have been used for its intended purpose. But what fun would that be? I picked up a $2.97 sample can of Behr Premium Plus Ultra paint, tinted to the country cottage blue I had in my mind’s eye since Treasure Central.
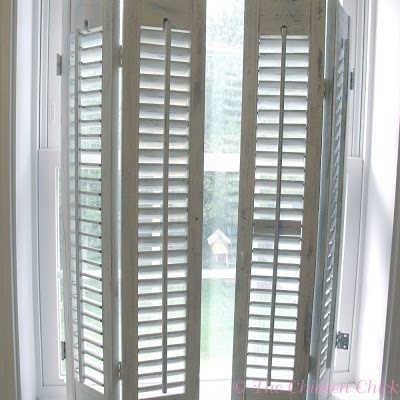
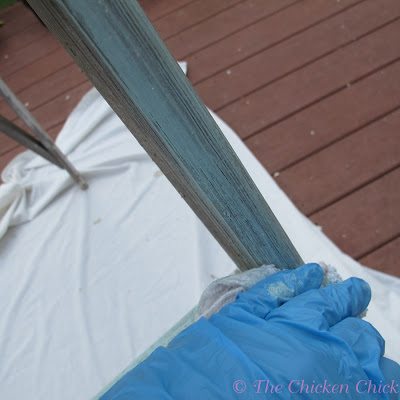
I made a pair of decorative shudders years ago with this same technique that still adorn a bathroom window in my house. The technique for refinishing these pieces is simple: sand, paint, wipe, sand. Done.
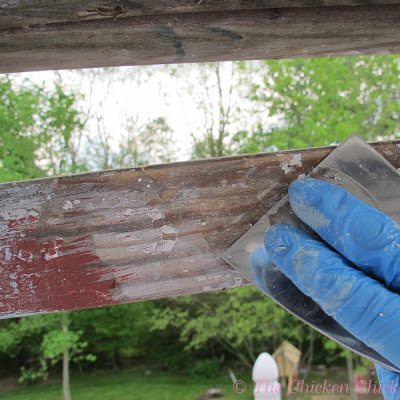
I used a fine grit sandpaper to remove any chipping paint.
Brushed a scant amount of paint onto the wood, immediately wiping off with a cotton rag. The drier the brush, the better.
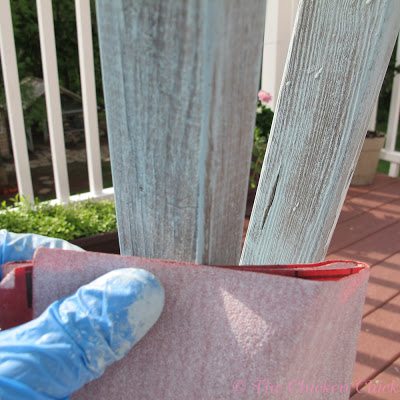
Lightly sanded raised edges and corners for a shabby, weathered look.
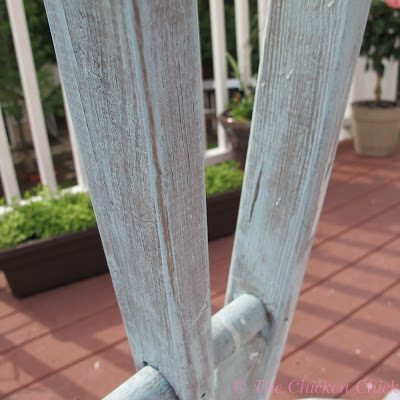
I toyed with the idea of putting a layer of polyurethane as a top-coat, but decided against it as I’d like the piece to continue to weather naturally.
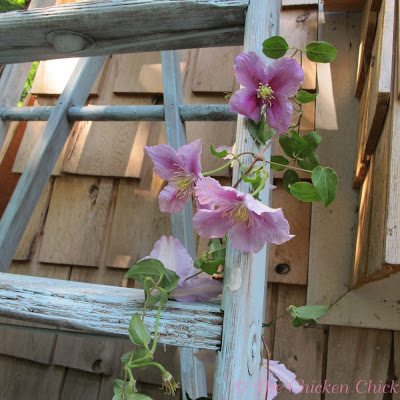
I planted some Clematis at the base of the ladder. Will my chickens eat it? Probably, but it can’t hurt to be optimistic, can it? I chose flowers and plants that would climb up and flow down the ladder and focused on ones that would do well in part shade/part sun.
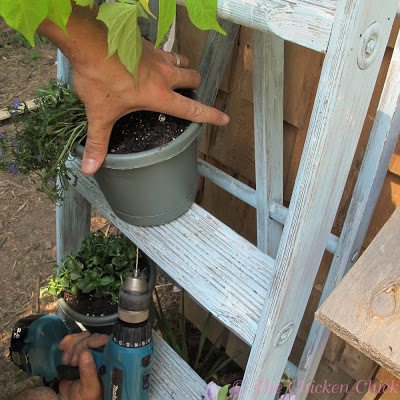
I screwed plastic flower pots and a window box liner onto the ladder from underneath. I planted the pots first and then attached them to the ladder because I needed to see how they would would look prior to committing to their final location. Empty pots could certainly be screwed into the ladder from the inside and then potted.
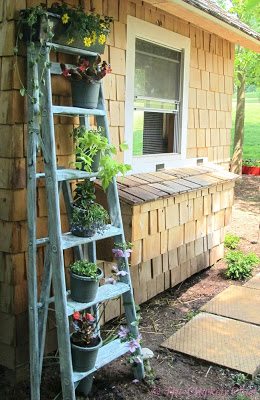
Now we wait to see whether the chickens will allow this container garden to flourish or not.


Kathy Shea Mormino
Affectionately known internationally as The Chicken Chick®, Kathy Shea Mormino shares a fun-loving, informative style to raising backyard chickens. …Read on


shop my SPONSORS


My husband rolls his eyes whenever I say I’m taking a trip to the town landfill. “Don’t come back with anything,” are the traditional parting words. He knows a drop-off is never my primary purpose; I visit the landfill mainly to check “Treasure Central,” also known as the reclamation center. Used items with plenty of life left in them await their new owners in Treasure Central and there’s no telling when one might hit the mother load. Go early and often, that’s my motto.
I lucked into a tired-looking ladder with its tag sale sticker still on it- a paltry five dollars was the asking price for this diamond in the rough. I had a plan for it before the trunk of my Volkswagen Jetta was open.The ladder was in brilliant condition and could have been used for its intended purpose. But what fun would that be? I picked up a $2.97 sample can of Behr Premium Plus Ultra paint, tinted to the country cottage blue I had in my mind’s eye since Treasure Central.
I made a pair of decorative shudders years ago with this same technique that still adorn a bathroom window in my house. The technique for refinishing these pieces is simple: sand, paint, wipe, sand. Done.
I used a fine grit sandpaper to remove any chipping paint.
Brushed a scant amount of paint onto the wood, immediately wiping off with a cotton rag. The drier the brush, the better.
Lightly sanded raised edges and corners for a shabby, weathered look.
I toyed with the idea of putting a layer of polyurethane as a top-coat, but decided against it as I’d like the piece to continue to weather naturally.
I planted some Clematis at the base of the ladder. Will my chickens eat it? Probably, but it can’t hurt to be optimistic, can it? I chose flowers and plants that would climb up and flow down the ladder and focused on ones that would do well in part shade/part sun.
I screwed plastic flower pots and a window box liner onto the ladder from underneath. I planted the pots first and then attached them to the ladder because I needed to see how they would would look prior to committing to their final location. Empty pots could certainly be screwed into the ladder from the inside and then potted.
Now we wait to see whether the chickens will allow this container garden to flourish or not.


Thanks April! I linked up a spray paint project, but don't see where my ladder project was featured. ?Confused. (but used to it! lol)
I love your ladder reuse! I have been looking for an old ladder – what a steal of a deal!! Thank you so much for linking this up at the Get Your DIY On Fall Challenge: Spray Paint! We hope to see you come on back over this evening (7pm EST) and bring along a chalkboard project!!
~Krista from the happy housie
Love this, Kathy! Thanks for linking it up at the Get Your DIY On link up party! I'm choosing this as one of my features on Sunday! Bring your spray painted project if you have one! :)
Hey I love this ladder!
Come on over and link up to my Paint Party going on now!!
http://startathome.blogspot.com/2013/07/paint-party-6.html
Brooke
Love it! You are one of the features today at the Anything Blue Friday party at The Dedicated House. Pop on in and grab a feature button for your blog. Here is the link to this week's party. http://thededicatedhouse.blogspot.com/2013/07/anything-blue-friday-week-18.html Hope to see you again at the blue soiree. Toodles, Kathryn @TheDediccatedHouse