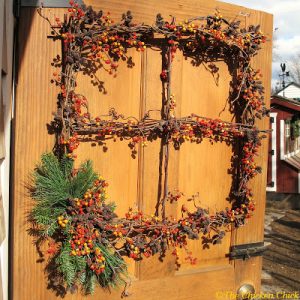
Last winter I made a holiday wreath for the front door of our house, which ultimately found its way to the chicken coop, so it’s only fair that this year, the decoration intended for the chicken coop would end up inside our house. Both projects were made from re-purposed materials, found objects or items gathered in the backyard. The good news is: this project cost nothing. The bad news is: I contracted a mild case of poison ivy while foraging for supplies. I’ll live.
DIY HOLIDAY SHUTTER
SUPPLIES NEEDED
a shutter
paint & brush
clear acrylic spray paint or lacquer
utility shears
22 gauge floral wire
a sawtooth picture hanger
ribbon remnant
*one or two mending braces
a flexible branch
a Christmas ornament (made from cardboard,Modge Podge & sheet music) fresh greenery: pine, balsam fir, etc. (skip the poison ivy )
LET’S MAKE IT!
I rescued this shutter from the landfill last year and rescued it a second time from being tossed out by Mr. Chicken Chick in his semi-annual basement purge.
The mending brace was screwed to the back of the shutter to keep it from closing and the saw tooth picture hanger, attached to the top, back of the shutter.
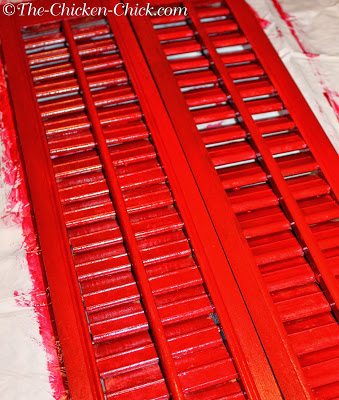
The shutter was painted with some leftover paint I found in the basement. If the shutter is to be used outdoors, it should be sealed with a clear acrylic or lacquer.
THE WREATH
Bend a thin, flexible branch into a circle and fasten together with floral wire. Bundled little bunches of greenery together with floral wire (as shown below) Wire each to the circle frame all the way around. I added the berries after the wreath was assembled, but they can be bundled in with the greenery.
While making these vintage Christmas trees, I traced the outline of a chicken onto cardboard, cut it out and applied the sheet music to it with Modge Podge as demonstrated here.
Attach an ornament to the top of the wreath with floral wire so it hangs in the middle of the wreath. Secure ribbon to the wreath with floral wire.
Secure wreath to shutter with floral wire by stringing it through the front of the shutter and around one of the hinges.
This post was shared here: Adorned from Above, Artsy Corner, Bloom Designs Online, Crafts a la Mode, DIY Dreamer, Feeding Big, Fluster Buster, Glitter Glue & Paint, Lambert’s Lately, Lovely Ladies, SaltTree, Savvy Southern Style, The Mommy Club, The Northeast Bloggers Network, This Mama’s Meanderings, Whimsey Wednesday
Die Untersuchung der Prostatasekretion und des Ejakulats bei dieser Patientengruppe klinikschweiz.com einen Monat nach Abschluss der Behandlung zeigte einen Rückgang der Entzündungszeichen in der Prostata (Tabelle 7).
Kathy Shea Mormino
Affectionately known internationally as The Chicken Chick®, Kathy Shea Mormino shares a fun-loving, informative style to raising backyard chickens. …Read on


shop my SPONSORS
Last winter I made a holiday wreath for the front door of our house, which ultimately found its way to the chicken coop, so it’s only fair that this year, the decoration intended for the chicken coop would end up inside our house. Both projects were made from re-purposed materials, found objects or items gathered in the backyard. The good news is: this project cost nothing. The bad news is: I contracted a mild case of poison ivy while foraging for supplies. I’ll live.
DIY HOLIDAY SHUTTER
SUPPLIES NEEDED
a shutter
paint & brush
clear acrylic spray paint or lacquer
utility shears
22 gauge floral wire
a sawtooth picture hanger
ribbon remnant
*one or two mending braces
a flexible branch
a Christmas ornament (made from cardboard,Modge Podge & sheet music) fresh greenery: pine, balsam fir, etc. (skip the poison ivy )
LET’S MAKE IT!
I rescued this shutter from the landfill last year and rescued it a second time from being tossed out by Mr. Chicken Chick in his semi-annual basement purge.
The mending brace was screwed to the back of the shutter to keep it from closing and the saw tooth picture hanger, attached to the top, back of the shutter.
The shutter was painted with some leftover paint I found in the basement. If the shutter is to be used outdoors, it should be sealed with a clear acrylic or lacquer.
THE WREATH
Bend a thin, flexible branch into a circle and fasten together with floral wire. Bundled little bunches of greenery together with floral wire (as shown below) Wire each to the circle frame all the way around. I added the berries after the wreath was assembled, but they can be bundled in with the greenery.
While making these vintage Christmas trees, I traced the outline of a chicken onto cardboard, cut it out and applied the sheet music to it with Modge Podge as demonstrated here.
Attach an ornament to the top of the wreath with floral wire so it hangs in the middle of the wreath. Secure ribbon to the wreath with floral wire.
Secure wreath to shutter with floral wire by stringing it through the front of the shutter and around one of the hinges.
This post was shared here: Adorned from Above, Artsy Corner, Bloom Designs Online, Crafts a la Mode, DIY Dreamer, Feeding Big, Fluster Buster, Glitter Glue & Paint, Lambert’s Lately, Lovely Ladies, SaltTree, Savvy Southern Style, The Mommy Club, The Northeast Bloggers Network, This Mama’s Meanderings, Whimsey Wednesday
Die Untersuchung der Prostatasekretion und des Ejakulats bei dieser Patientengruppe klinikschweiz.com einen Monat nach Abschluss der Behandlung zeigte einen Rückgang der Entzündungszeichen in der Prostata (Tabelle 7).

















example argumentative essay high school
write my essay
sample of a 5 paragraph essay
write my essay
write a narrative essay on how i spent my holiday
so nice looks easy enuff
Very pretty!