
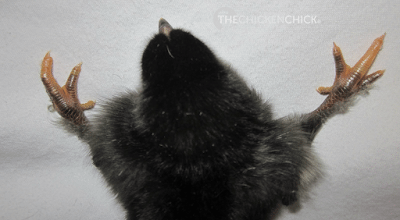
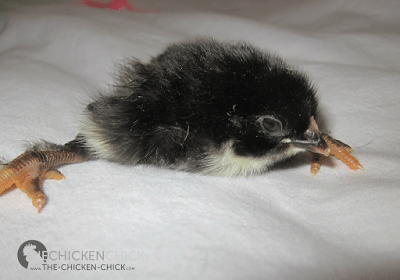
Spraddle leg, also known as ‘splay leg,’ is a deformity of a chicken’s legs, characterized by feet pointing to the side, instead of forward, making walking difficult, if not impossible. Spraddle leg can be permanent if left uncorrected, but it’s simple to correct, so let’s look at how to fix it.

CAUSES
One cause of spraddle leg is slick floors that result in chicks losing their footing. The legs twist out from the hip and remain in that position unless corrected.
Other causes are:
- temperature fluxuations during incubation
- a difficult hatch that makes legs weak
- leg or foot injury
- brooder overcrowding
- a vitamin deficiency
PREVENTION
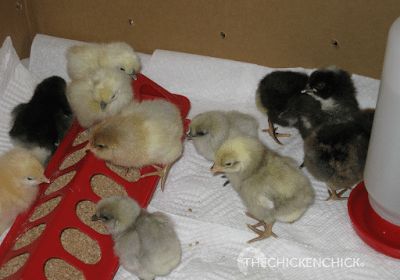
Providing traction for tiny feet is the best way to avoid spraddle leg (in cases where it can be avoided). Chicks should not walk directly on dry newspaper. Safer options are paper towels or rubber shelf liner covering newspaper.
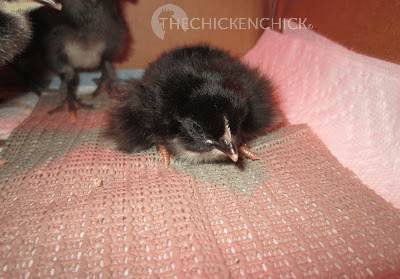
Valentina (who hatched the day after Valentine’s Day) had been abandoned while under the care of a hen. The egg was not warm when I found it. Hoping for the best, I put it in my incubator right away, knowing it was close to hatch day. The chick had a difficult time freeing itself from the shell and required assistance hatching. The leg deformity was immediately obvious. Inconsistent temperatures during incubation combined with the difficulties hatching were clearly the cause of her spraddle legs. She couldn’t move from this position.
TREATMENT
The younger a chick is when treated, the better chance of preserving normal leg function. Untreated, a chick can die from inability to reach food and water without assistance. A chick can learn to push up, stand and walk correctly within less than a week, often much sooner if treated.
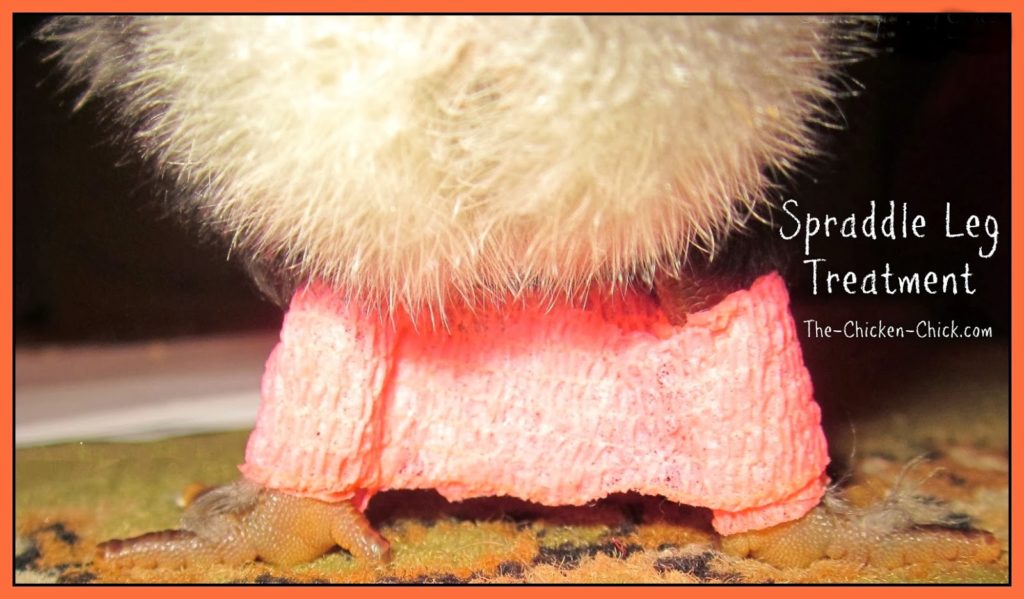
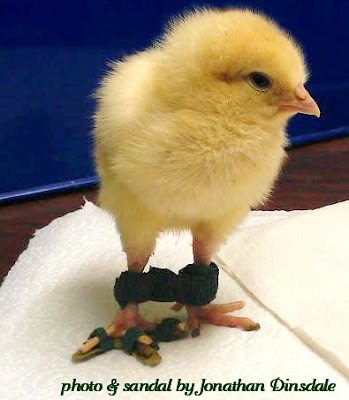
The legs must be restricted, braced or ‘hobbled,’ to provide stability and allow the chick’s bones and muscles to grow and strengthen in the correct position.
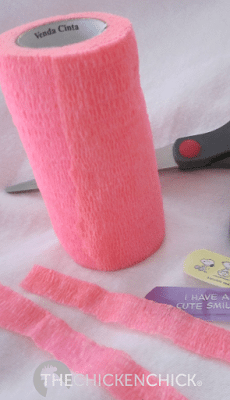
Any number of materials can be used for a brace, from bandaids to rubber bands, yarn to tape. My preference is VetRap. It’s easy to use, sticks to itself, stays securely in place, doesn’t restrict circulation when properly applied, won’t damage the skin or leg feathers, is easy to remove and has just enough stretch to allow the chick to practice walking.
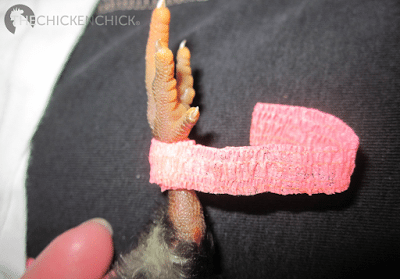
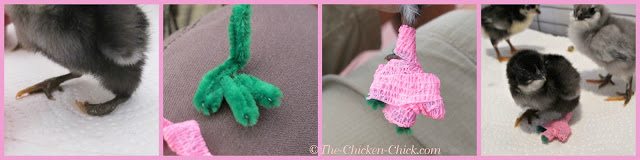
I wrap two little pieces of VetRap around each leg just below the knee joint, being careful not to wrap too tightly. Since it sticks to itself, no tape is required. I find that these anchors make it easier to change the brace.
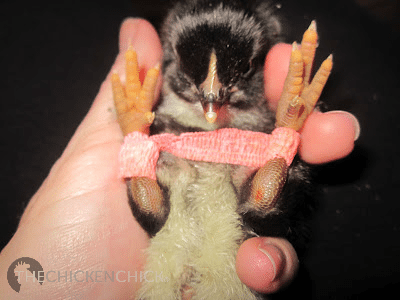
Next, I cut a long piece (approx 6-7″) to bind the legs together. The legs should be positioned underneath the chick, slightly wider than a normal stance and should allow a slight amount of play in between the legs for the chick to move a little bit. The brace should be removed once daily to assess the progress and re-adjust as needed. It’s important to ensure that the portion touching the legs does not restrict blood-flow. If there are indentations on the chick’s legs, the brace is too tight. As the chick’s legs strengthen, gradually allow for more slack between the legs until it is clear that support is no longer needed.

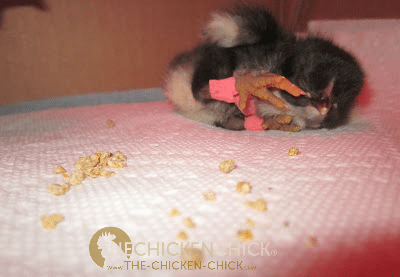
This wrap job is not ideal, but the photo was too funny not to share.”Police! Show me your hands!”
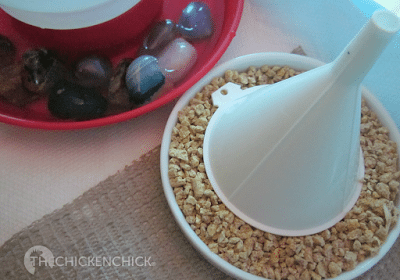
Chicks being rehabilitated must be supervised near water as they can drown. They will require assistance drinking at first. I put stones in the water as a safety measure. (The funnel just dissuades chicks from standing in the dish, until they learn to knock it over, of course.)
PHYSICAL THERAPY
Brief physical therapy sessions help build leg muscles and balance. Support the body and let the chick push up to get their balance. As it finds its balance, gradually reduce the amount of assistance provided until it can stand independently. One minute sessions, 6-8 times throughout the first day are very important.
This is a video of Valentina at the end of the first day of treatment.
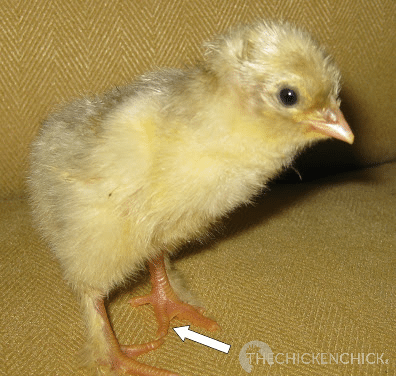
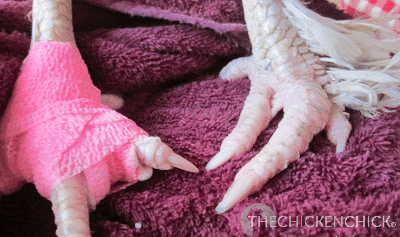
CROOKED TOES
Most causes of spraddle leg mentioned above can also cause crooked toes. According to Gail Damerow in The Chicken Encyclopedia, crooked toes can also be caused when newly hatched chicks have too much room in the incubator; in trying to get up and about before their frail bones are ready for the action, they can bend them. Crooked toes in chicks do not result in debilitation and are easily corrected if addressed immediately.

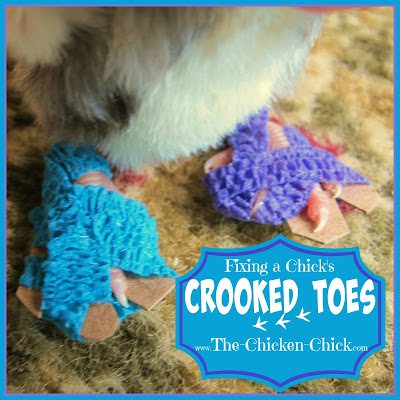
To straighten crooked toes: Create a chick sandal by using thin cardboard (just heavier than oak tag paper) and trace around the foot (either mitten-style or glove-style as shown below). Cut wooden skewers, coffee stirrers or pipe cleaners (being careful to protect against sharp ends), to the length of the toe. With tiny strips of VetRap, attach the skewers/pipe cleaners to the toes securely enough that the splint will not move but loosely enough that circulation is not being restricted. Add the cardboard sandal to the bottom of the foot and VetRap it to the bottom.
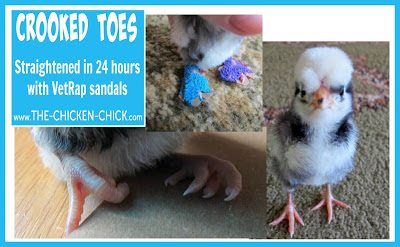
The VetRap provides traction to prevent slipping and is easier to work with than other options like tape. Generally, the younger the chick, the faster the response to treatment. The toes usually remain straight after a day or two with the sandals, but may take a little longer for the bones to harden in the correct position.

Here’s a crooked toes “cast” I made. HOW TO: Cut two squares of Vetrap just larger than the chick’s footprint. Place one square on a flat surface and have the chick stand on the square with toes in corrected positions. Place the second Vetrap square on the top of the toes aligned with the first square. Press the Vetrap pieces together around each toe so they stick together. CAREFULLY trim around the toes with scissors and gently pinch the Vetrap up around the top of the toes into tiny casts.

Kathy Shea Mormino
Affectionately known internationally as The Chicken Chick®, Kathy Shea Mormino shares a fun-loving, informative style to raising backyard chickens. …Read on


Spraddle leg, also known as ‘splay leg,’ is a deformity of a chicken’s legs, characterized by feet pointing to the side, instead of forward, making walking difficult, if not impossible. Spraddle leg can be permanent if left uncorrected, but it’s simple to correct, so let’s look at how to fix it.
CAUSES
One cause of spraddle leg is slick floors that result in chicks losing their footing. The legs twist out from the hip and remain in that position unless corrected.
Other causes are:
- temperature fluxuations during incubation
- a difficult hatch that makes legs weak
- leg or foot injury
- brooder overcrowding
- a vitamin deficiency
PREVENTION
Providing traction for tiny feet is the best way to avoid spraddle leg (in cases where it can be avoided). Chicks should not walk directly on dry newspaper. Safer options are paper towels or rubber shelf liner covering newspaper.
Valentina (who hatched the day after Valentine’s Day) had been abandoned while under the care of a hen. The egg was not warm when I found it. Hoping for the best, I put it in my incubator right away, knowing it was close to hatch day. The chick had a difficult time freeing itself from the shell and required assistance hatching. The leg deformity was immediately obvious. Inconsistent temperatures during incubation combined with the difficulties hatching were clearly the cause of her spraddle legs. She couldn’t move from this position.
TREATMENT
The younger a chick is when treated, the better chance of preserving normal leg function. Untreated, a chick can die from inability to reach food and water without assistance. A chick can learn to push up, stand and walk correctly within less than a week, often much sooner if treated.
The legs must be restricted, braced or ‘hobbled,’ to provide stability and allow the chick’s bones and muscles to grow and strengthen in the correct position.
Any number of materials can be used for a brace, from bandaids to rubber bands, yarn to tape. My preference is VetRap. It’s easy to use, sticks to itself, stays securely in place, doesn’t restrict circulation when properly applied, won’t damage the skin or leg feathers, is easy to remove and has just enough stretch to allow the chick to practice walking.
I wrap two little pieces of VetRap around each leg just below the knee joint, being careful not to wrap too tightly. Since it sticks to itself, no tape is required. I find that these anchors make it easier to change the brace.
Next, I cut a long piece (approx 6-7″) to bind the legs together. The legs should be positioned underneath the chick, slightly wider than a normal stance and should allow a slight amount of play in between the legs for the chick to move a little bit. The brace should be removed once daily to assess the progress and re-adjust as needed. It’s important to ensure that the portion touching the legs does not restrict blood-flow. If there are indentations on the chick’s legs, the brace is too tight. As the chick’s legs strengthen, gradually allow for more slack between the legs until it is clear that support is no longer needed.
This wrap job is not ideal, but the photo was too funny not to share.”Police! Show me your hands!”
Chicks being rehabilitated must be supervised near water as they can drown. They will require assistance drinking at first. I put stones in the water as a safety measure. (The funnel just dissuades chicks from standing in the dish, until they learn to knock it over, of course.)
PHYSICAL THERAPY
Brief physical therapy sessions help build leg muscles and balance. Support the body and let the chick push up to get their balance. As it finds its balance, gradually reduce the amount of assistance provided until it can stand independently. One minute sessions, 6-8 times throughout the first day are very important.
This is a video of Valentina at the end of the first day of treatment.
CROOKED TOES
Most causes of spraddle leg mentioned above can also cause crooked toes. According to Gail Damerow in The Chicken Encyclopedia, crooked toes can also be caused when newly hatched chicks have too much room in the incubator; in trying to get up and about before their frail bones are ready for the action, they can bend them. Crooked toes in chicks do not result in debilitation and are easily corrected if addressed immediately.
To straighten crooked toes: Create a chick sandal by using thin cardboard (just heavier than oak tag paper) and trace around the foot (either mitten-style or glove-style as shown below). Cut wooden skewers, coffee stirrers or pipe cleaners (being careful to protect against sharp ends), to the length of the toe. With tiny strips of VetRap, attach the skewers/pipe cleaners to the toes securely enough that the splint will not move but loosely enough that circulation is not being restricted. Add the cardboard sandal to the bottom of the foot and VetRap it to the bottom.
The VetRap provides traction to prevent slipping and is easier to work with than other options like tape. Generally, the younger the chick, the faster the response to treatment. The toes usually remain straight after a day or two with the sandals, but may take a little longer for the bones to harden in the correct position.
Here’s a crooked toes “cast” I made. HOW TO: Cut two squares of Vetrap just larger than the chick’s footprint. Place one square on a flat surface and have the chick stand on the square with toes in corrected positions. Place the second Vetrap square on the top of the toes aligned with the first square. Press the Vetrap pieces together around each toe so they stick together. CAREFULLY trim around the toes with scissors and gently pinch the Vetrap up around the top of the toes into tiny casts.


I have a hen "Wooble" who was treated unsuccessfully when a chick, she walks with a hop,skip,limp. If she has had a busy day she has difficulty and needs getting into coop at night. She was given to me and is an awesome pet. Wish there was a way to fix her now, she is about 1 year old.
Very good demonstration! Thanks for sharing. Is that a black copper marans chick by any chance? I have a few BC marans hens this year but am having difficulty getting their eggs to hatch. My other breeds hatch fine, but my BCM's need assistance hatching.
Thank you! That is a Black Copper Marans chick! I wonder why your BCM egglets are giving you trouble? This one did pip on the wrong end and needed help out but otherwise, my hatches have gone smoothly with them. Curious.
Thanks for stopping in today!