
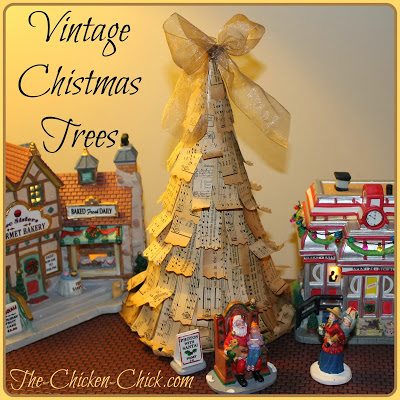
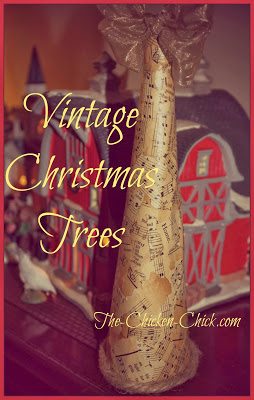
This project started out as a Christmas gift for my daughters’ piano teacher, but I loved these little trees so much that I made a variety of sizes and variations for the Christmas village on top of our piano. All of the supplies were either re-purposed, free or on-hand from a previous craft project. Right ON!
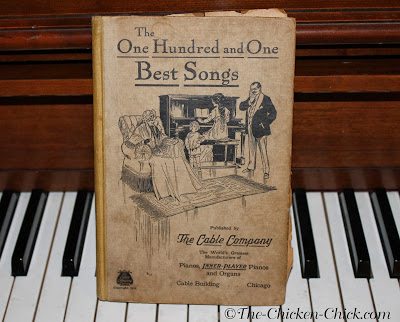
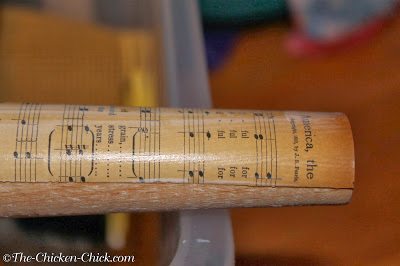
I acquired the old music book at a local antique store in a barter for an antique laundry ringer. The pages were super dark and fairly brittle, which limited any folding/rolling/shaping of the paper. I made two basic designs: a torn tree and a curly tree. Both are super easy to make, but the curly tree is a little more time-consuming.
DIY VINTAGE CHRISTMAS TREES
SUPPLIES NEEDED
empty boxes (cereal, pasta, or any lightweight cardboard)
an old book (the darker the pages, the better)
Modge Podge (I prefer the matte finish)
masking tape
a paint brush
scissors/pinking shears/utility shears (maybe)
Popsicle sticks
hot glue gun & glue sticks
ribbon, hemp string, glitter (optional)
LET’S MAKE IT!
Take apart the box at its seams & cut off the flaps on all four sides. With the printed portion of the box ending up on the inside, roll the box into a cone shape. Secure the seam with masking tape inside and out. Trim the bottom of the cone so it sits flat on the table. You can measure and mark, but I just free-handed it.
THE TORN VINTAGE CHRISTMAS TREE
For the torn tree, simply rip pages of the book into irregular pieces of varying sizes. Paint a thin layer of Modge Podge on the cardboard cone and stick a piece of the torn paper to the cone. Paint the top of the paper with a little Modge Podge. Repeat the process, overlapping the pieces of paper until the entire cone is covered.
STAR TREE TOPPER
To make the star, I downloaded a star template that I liked. I traced it onto a page of the vintage paper folded in half and cut out two stars simultaneously.
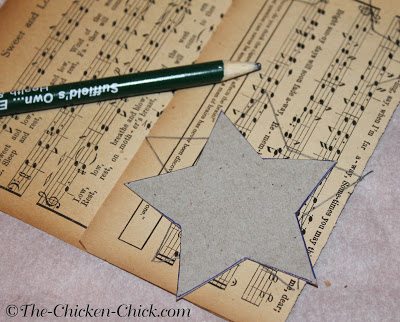
I cut a small strip of wood off my Popsicle stick with utility shears, then I painted the top of both stars with Modge Podge. I placed the Popsicle stick on top of one of the stars, then stuck the second star, wet side down, on top of the first star. When the star was dry, I lightly brushed the outside of the star with Modge Podge and sprinkled a tiny bit of glitter on it.
I placed a tiny dot of hot glue onto the Popsicle stick and placed it into the top of the cone. I don’t have a picture of the tree with this star on top because it wasn’t my fav, but it’s an option you may prefer to a ribbon topper.

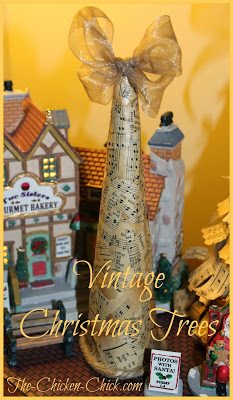
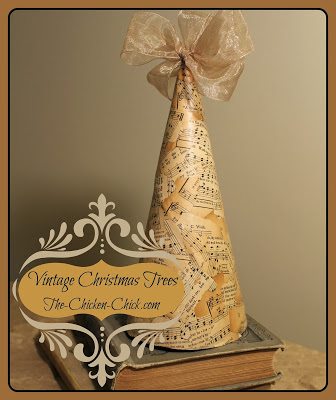
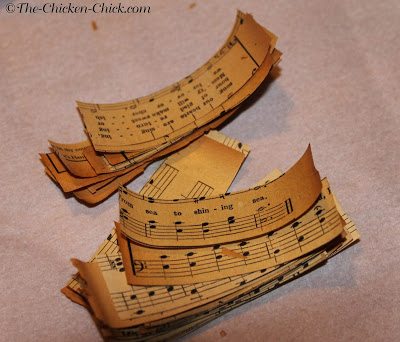
CURLY VINTAGE CHRISTMAS TREE
For the curly Christmas tree, I painted Modge Podge on the paper and laid it over a rolling pin for two reasons: first, to give the ancient papyrus some structural integrity lest it crumble and second, to hold the slightly curled shape.
When the Modge Podge was dry, I cut the paper into strips of equal size. This would have been a good time to trim one end with pinking shears for a cool-looking edge, but I went the labor-intensive route because it didn’t occur to me until after the tree was assembled that a little texture would be nice.
Beginning along the bottom edge of the cardboard cone, paint a section with Modge Podge. Begin applying the paper strips side-by-side. Complete one row all the way around the tree before moving on to the next level up the cone.
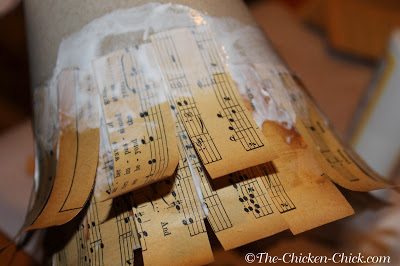
When dry, I trimmed the ends of the strips.

I hemmed and hawed about whether to finish the bottom edges of the trees, ultimately deciding that I preferred them unfinished. I did hot glue hemp string to the bottom edge of one tree, shown below. It works near the barn in my Christmas village.

This post was shared here: Adorned from Above, Artsy Corner, Bloom Designs Online, Crafts a la Mode , Dear Creatives, DIY Dreamer,Fluster Buster, Ducks ‘n a Row, Glitter Glue & Paint, Lamberts Lately, Lavender Garden Cottage, Lovely Ladies Linky, The Mommy Club, The Northeast Bloggers Network, The Pin Junkie, SaltTree, Savvy Southern Style,The Pink Momma, Whimsey Wednesday

Kathy Shea Mormino
Affectionately known internationally as The Chicken Chick®, Kathy Shea Mormino shares a fun-loving, informative style to raising backyard chickens. …Read on


This project started out as a Christmas gift for my daughters’ piano teacher, but I loved these little trees so much that I made a variety of sizes and variations for the Christmas village on top of our piano. All of the supplies were either re-purposed, free or on-hand from a previous craft project. Right ON!
I acquired the old music book at a local antique store in a barter for an antique laundry ringer. The pages were super dark and fairly brittle, which limited any folding/rolling/shaping of the paper. I made two basic designs: a torn tree and a curly tree. Both are super easy to make, but the curly tree is a little more time-consuming.
DIY VINTAGE CHRISTMAS TREES
SUPPLIES NEEDED
empty boxes (cereal, pasta, or any lightweight cardboard)
an old book (the darker the pages, the better)
Modge Podge (I prefer the matte finish)
masking tape
a paint brush
scissors/pinking shears/utility shears (maybe)
Popsicle sticks
hot glue gun & glue sticks
ribbon, hemp string, glitter (optional)
LET’S MAKE IT!
Take apart the box at its seams & cut off the flaps on all four sides. With the printed portion of the box ending up on the inside, roll the box into a cone shape. Secure the seam with masking tape inside and out. Trim the bottom of the cone so it sits flat on the table. You can measure and mark, but I just free-handed it.
THE TORN VINTAGE CHRISTMAS TREE
For the torn tree, simply rip pages of the book into irregular pieces of varying sizes. Paint a thin layer of Modge Podge on the cardboard cone and stick a piece of the torn paper to the cone. Paint the top of the paper with a little Modge Podge. Repeat the process, overlapping the pieces of paper until the entire cone is covered.
STAR TREE TOPPER
To make the star, I downloaded a star template that I liked. I traced it onto a page of the vintage paper folded in half and cut out two stars simultaneously.
I cut a small strip of wood off my Popsicle stick with utility shears, then I painted the top of both stars with Modge Podge. I placed the Popsicle stick on top of one of the stars, then stuck the second star, wet side down, on top of the first star. When the star was dry, I lightly brushed the outside of the star with Modge Podge and sprinkled a tiny bit of glitter on it.
I placed a tiny dot of hot glue onto the Popsicle stick and placed it into the top of the cone. I don’t have a picture of the tree with this star on top because it wasn’t my fav, but it’s an option you may prefer to a ribbon topper.
CURLY VINTAGE CHRISTMAS TREE
For the curly Christmas tree, I painted Modge Podge on the paper and laid it over a rolling pin for two reasons: first, to give the ancient papyrus some structural integrity lest it crumble and second, to hold the slightly curled shape.
When the Modge Podge was dry, I cut the paper into strips of equal size. This would have been a good time to trim one end with pinking shears for a cool-looking edge, but I went the labor-intensive route because it didn’t occur to me until after the tree was assembled that a little texture would be nice.
Beginning along the bottom edge of the cardboard cone, paint a section with Modge Podge. Begin applying the paper strips side-by-side. Complete one row all the way around the tree before moving on to the next level up the cone.
When dry, I trimmed the ends of the strips.
I hemmed and hawed about whether to finish the bottom edges of the trees, ultimately deciding that I preferred them unfinished. I did hot glue hemp string to the bottom edge of one tree, shown below. It works near the barn in my Christmas village.
This post was shared here: Adorned from Above, Artsy Corner, Bloom Designs Online, Crafts a la Mode , Dear Creatives, DIY Dreamer,Fluster Buster, Ducks ‘n a Row, Glitter Glue & Paint, Lamberts Lately, Lavender Garden Cottage, Lovely Ladies Linky, The Mommy Club, The Northeast Bloggers Network, The Pin Junkie, SaltTree, Savvy Southern Style,The Pink Momma, Whimsey Wednesday


Omg thats amazing :)
I love these! Thanks for sharing!!