
My baby girl turned six this week and we held her party at the most adorable girls’ spa. The girls got cupcake manicures, chocolate facials and princess up-dos, they made lip-gloss, shopped in the gift loft, raided the candy bar and karaoked their little hearts out.
My baby girl. ♥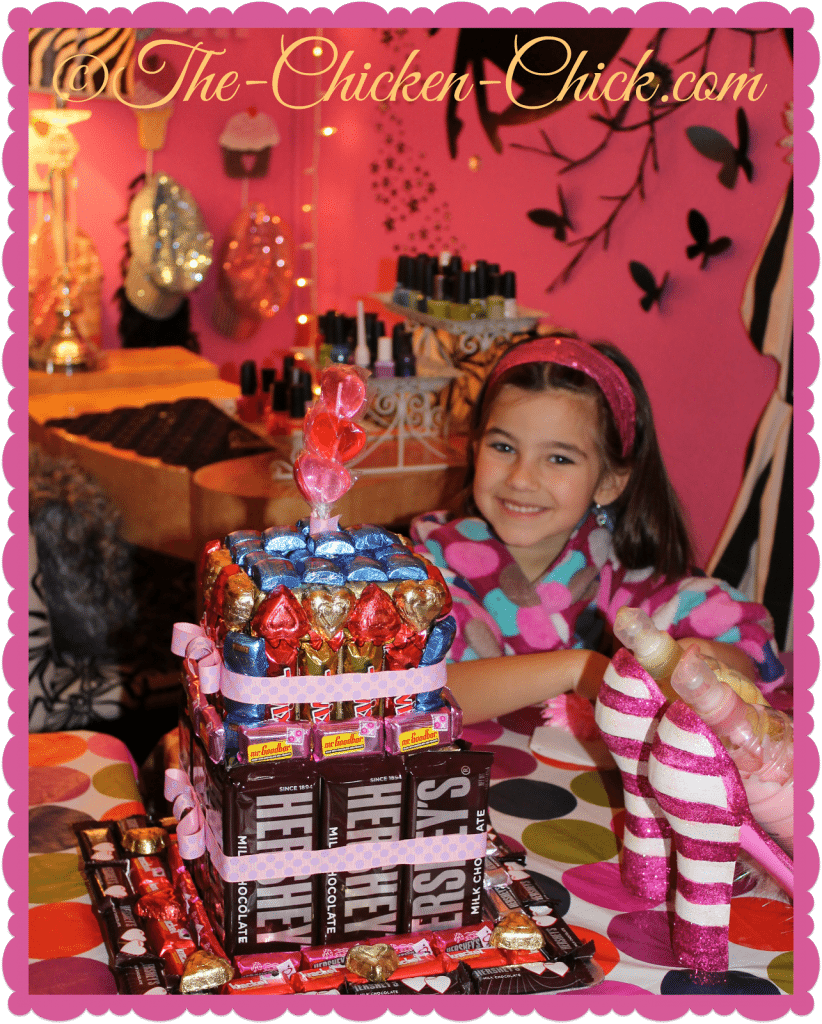
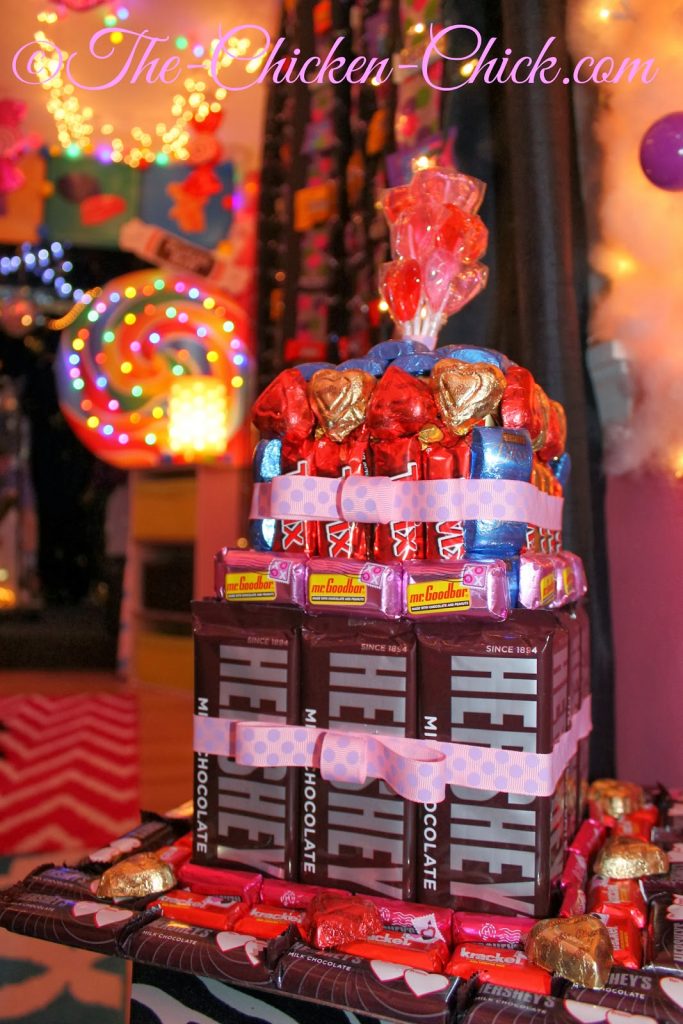
Having held two parties at this spa previously, I was aware of their ‘no outside food’ policy- it’s an insurance/liability thing. Leave it to the lawyers to spoil the fun. I always make my daughters’ birthday cakes, so this policy is a real bummer. The spa ordinarily presents the girls with a candy cake as the birthday song is sung, but it’s a show cake, which is promptly whisked away after the candle is blown out, so this year, I decided to make my baby girl her own candy cake that she would take home.

The assembly took a little more time than anticipated, but it was super fun to make and I’m sure I will make more for celebrations in the future Now that I think of it…they’d make a fun birthday gift for someone too. I let my daughter select all of her favorite candies and then I picked a few of my own. Hey! I didn’t want to run out. Backup is important in a project like this. :) This project can be done very inexpensively with candy from the dollar store or by scaling the size of the cake down.
DIY CANDY CAKE
SUPPLIES NEEDED
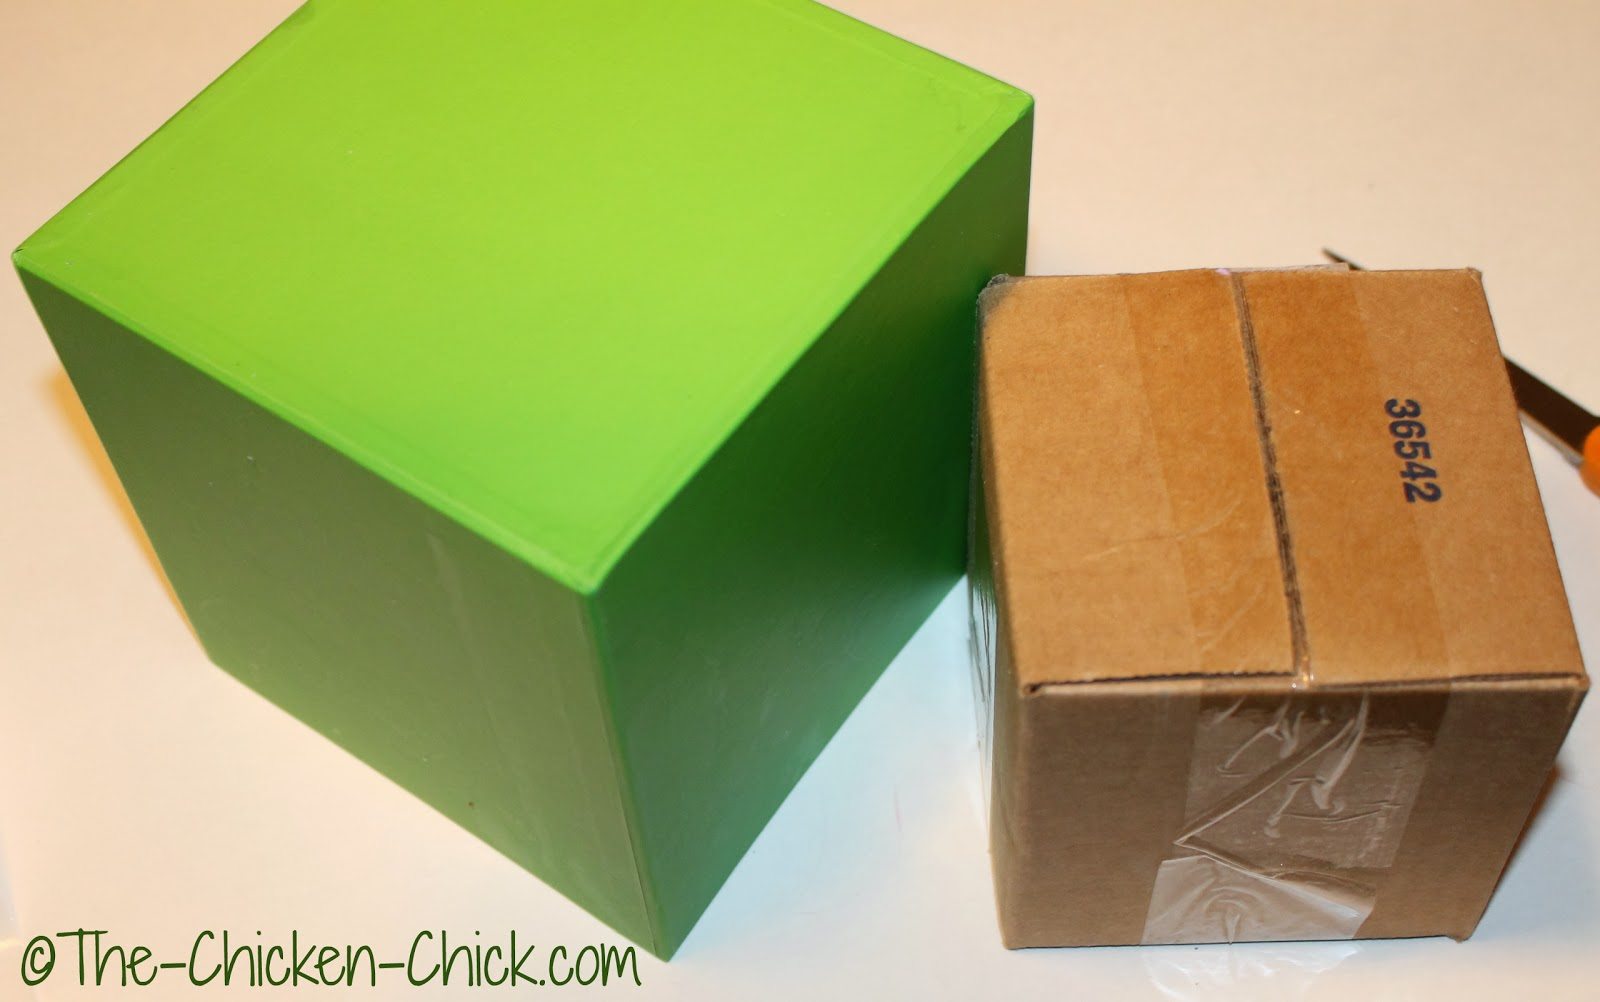
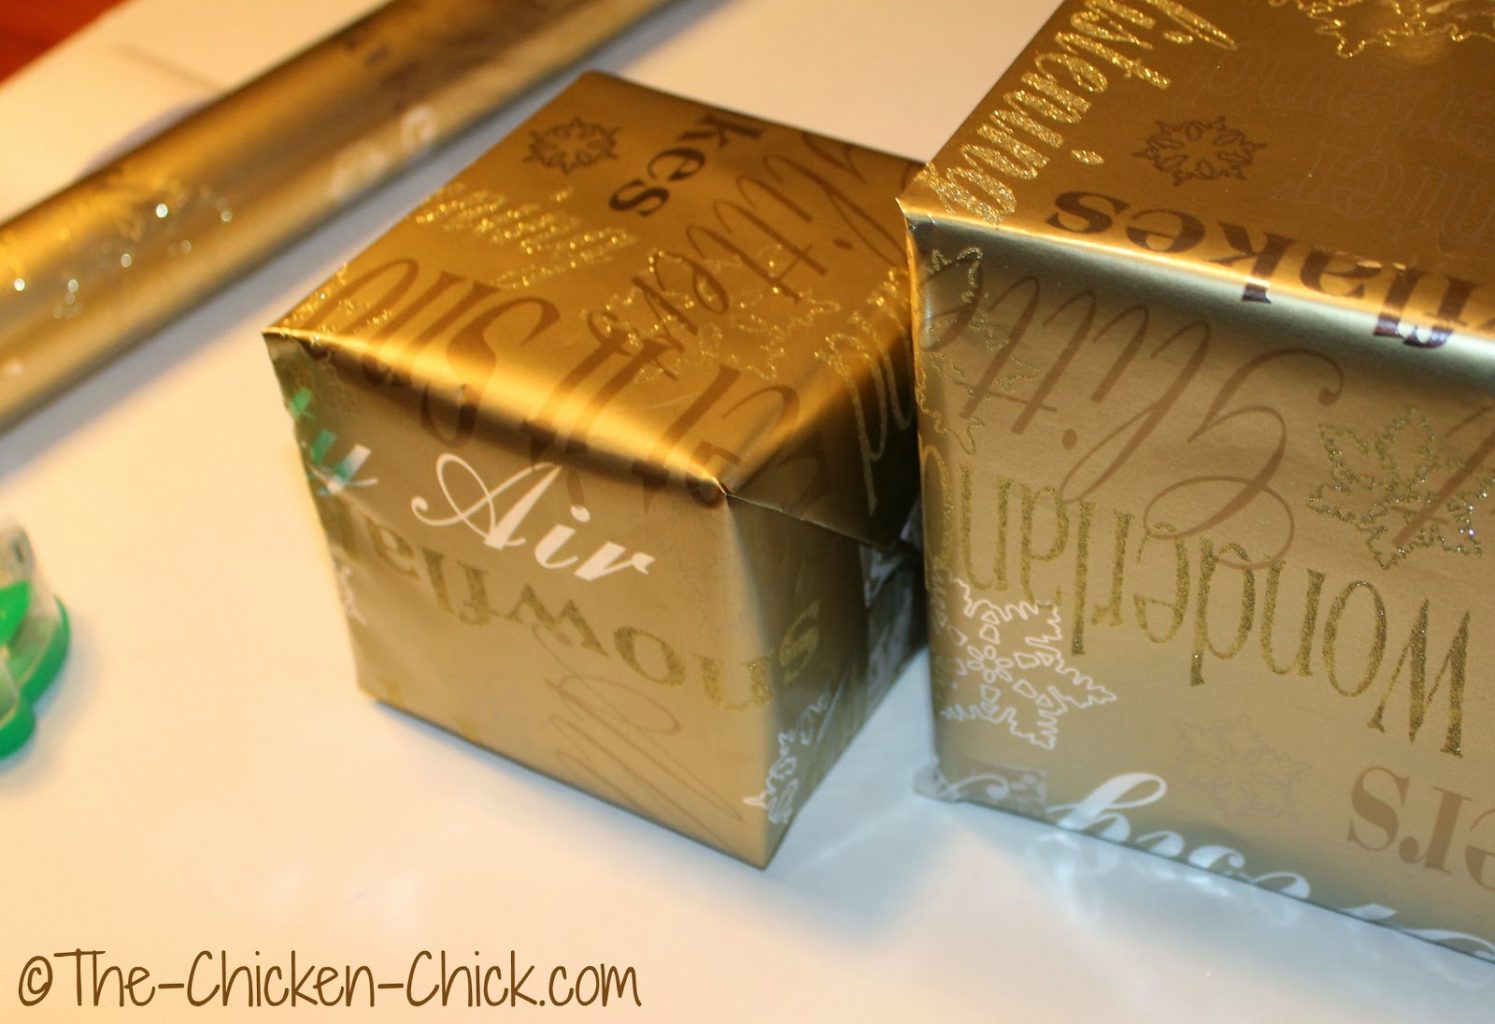
2 square boxes, hat boxes or cookie tins, one smaller than the other.
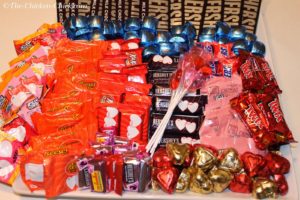
Lots-o-candy, including lollipops for the cake topper.
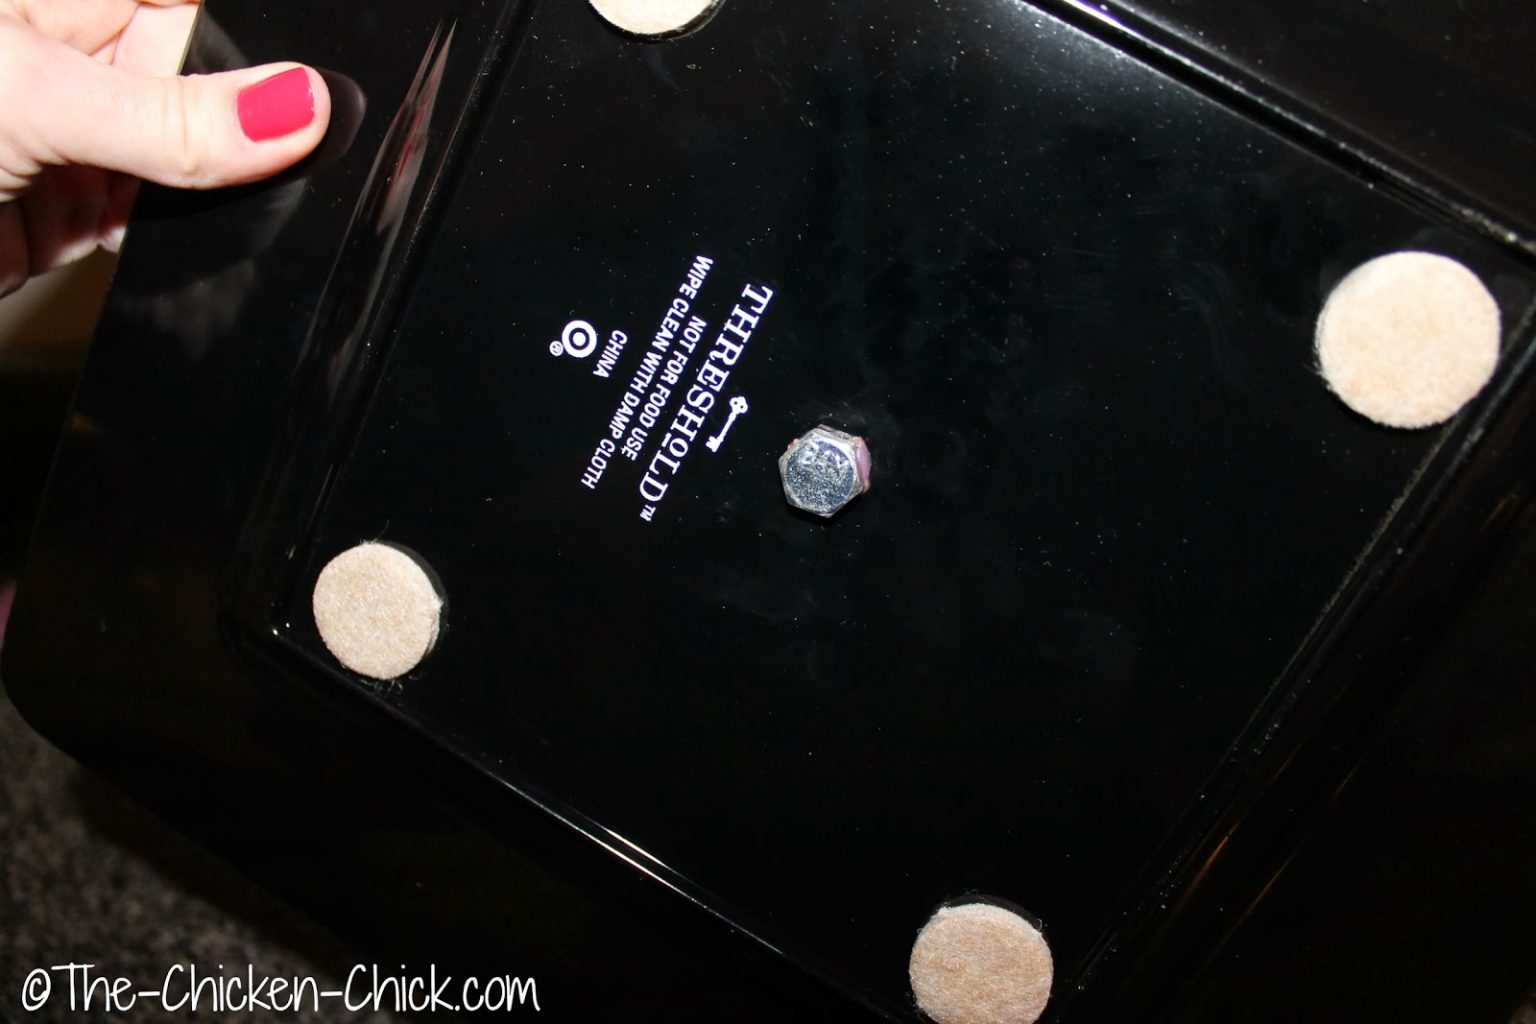
A base for the cake (eg: a plastic charger, thick cardboard)
wrapping paper
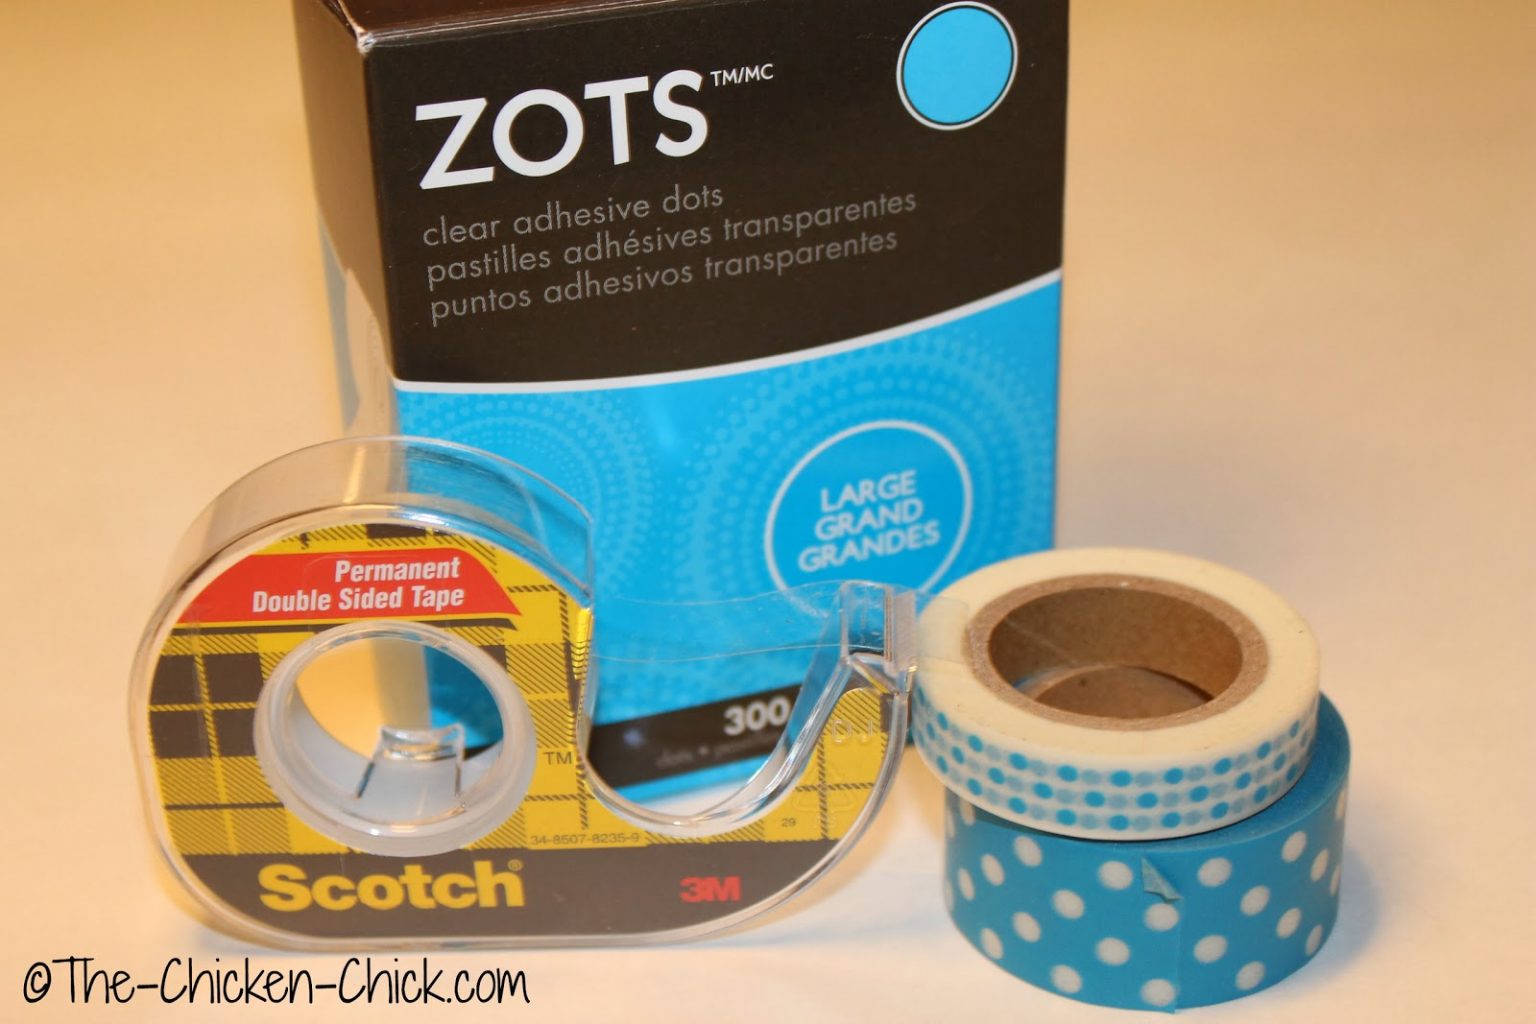
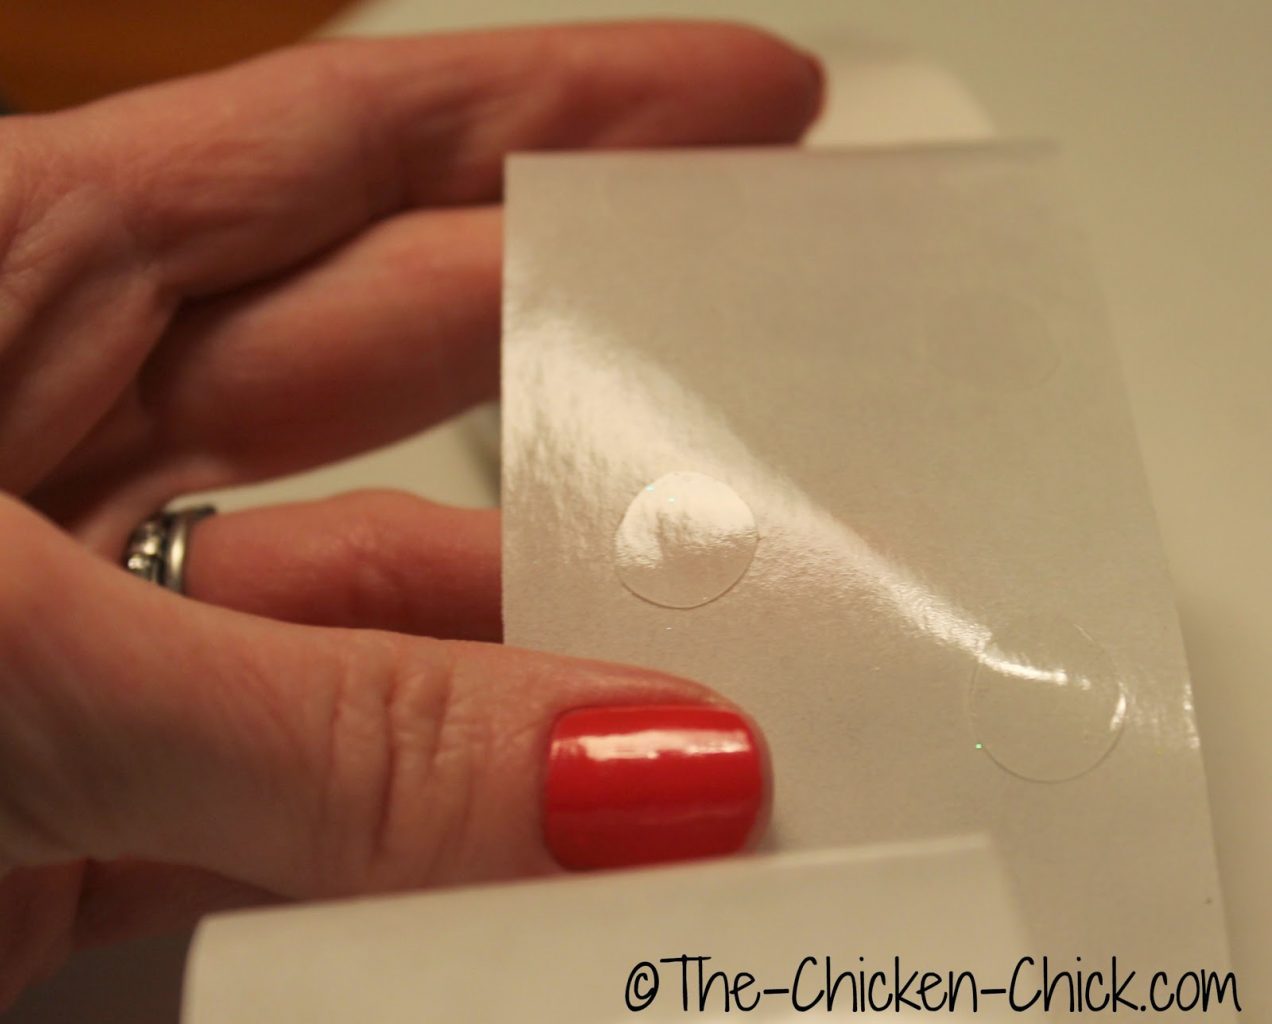
tape, double-sided tape, self-adhesive dots or a cool glue gun
scissors
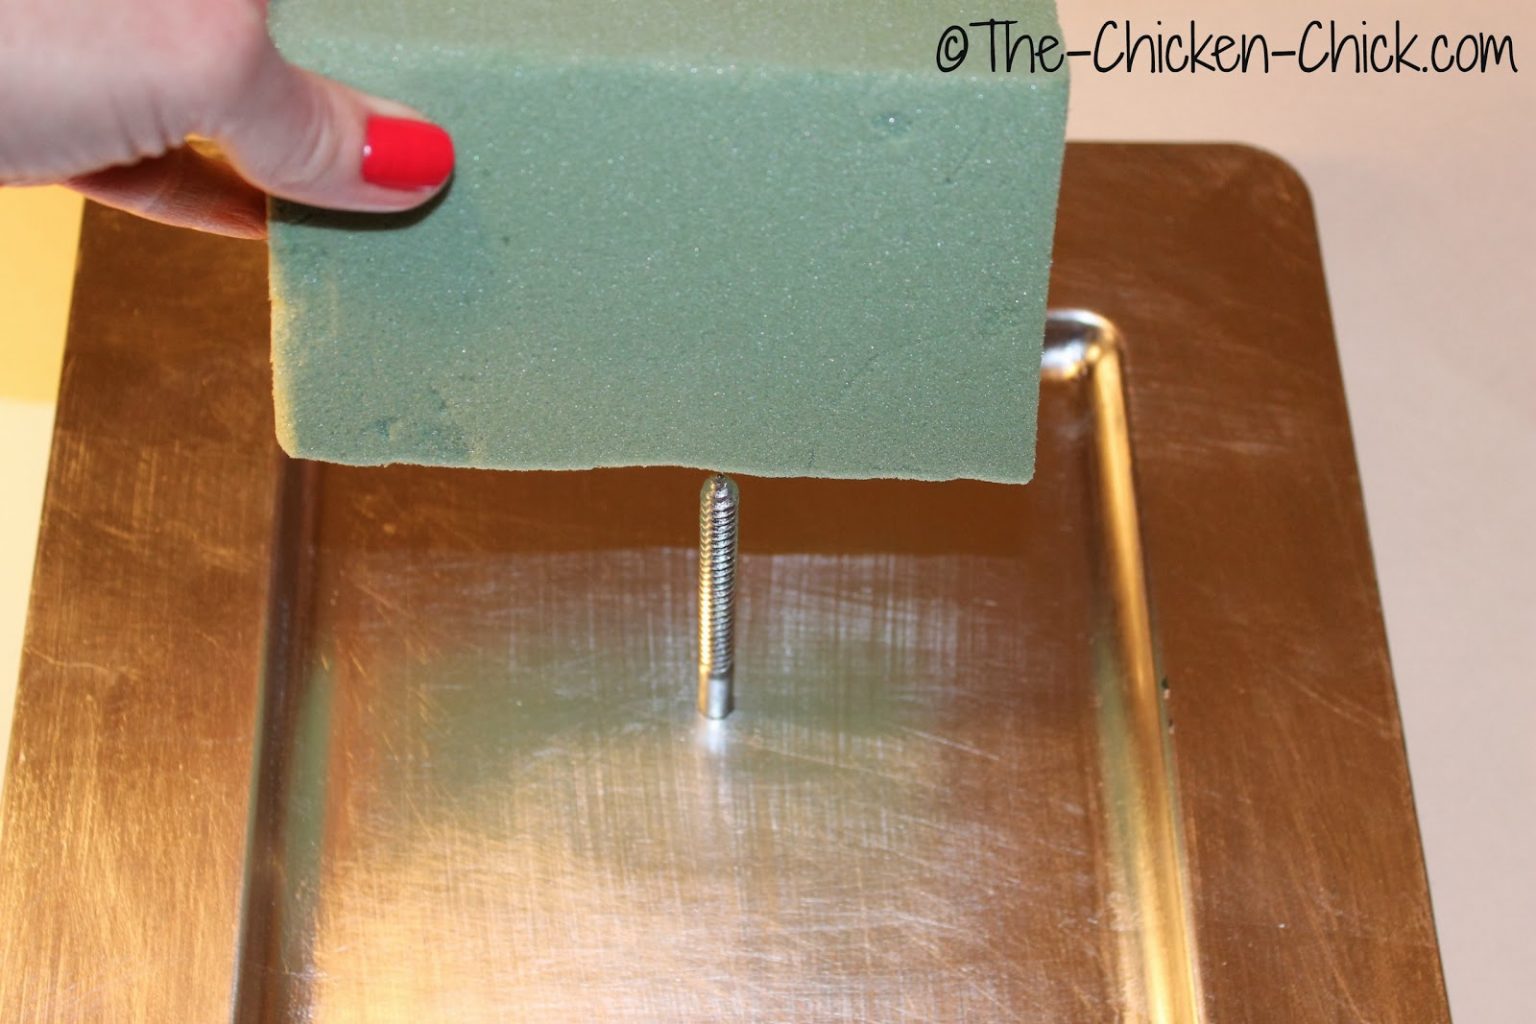
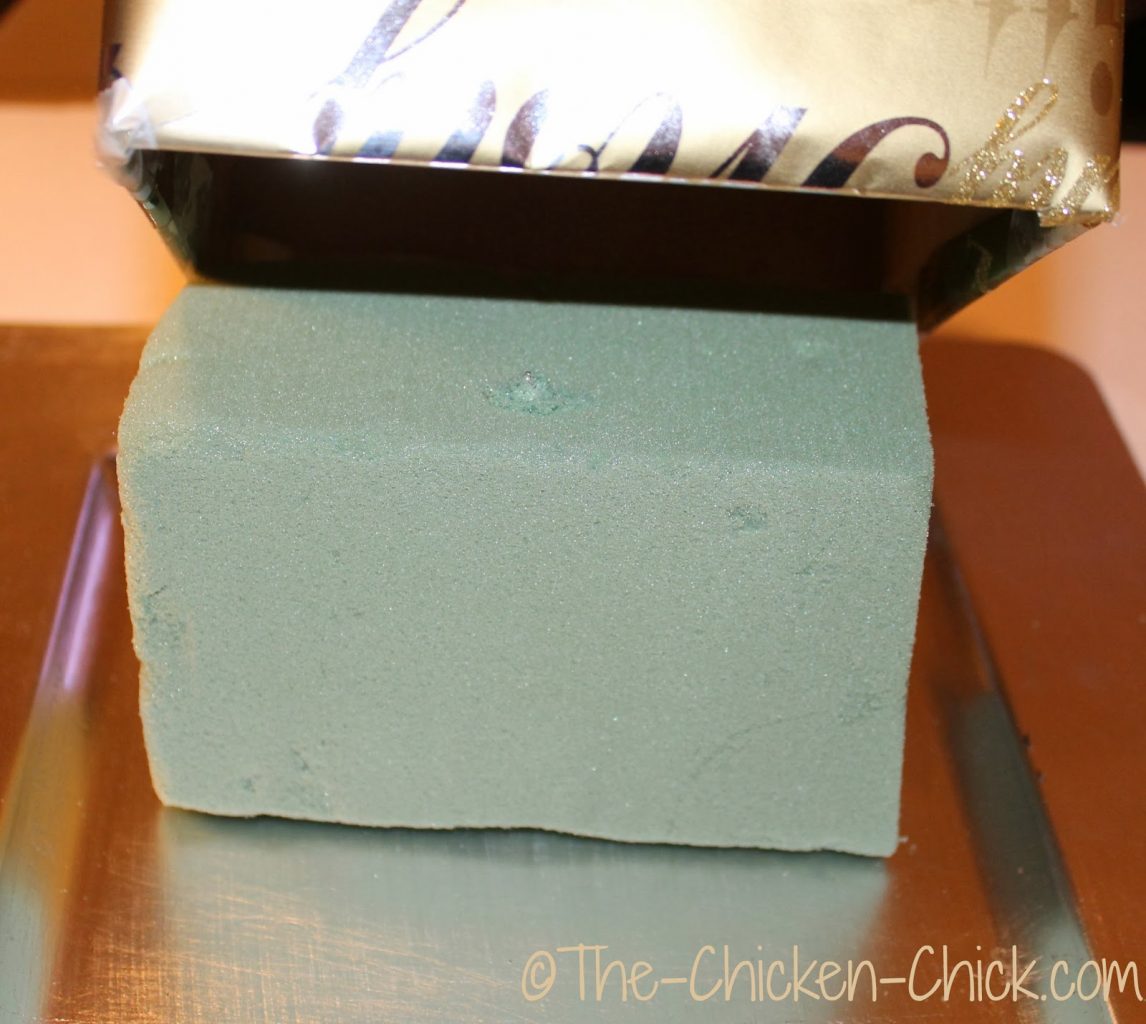
a chunk of floral foam & large serrated knife
utility knife
a ginormous screw & drill
Washi tape or ribbon
LET’S MAKE IT!
Drill the screw through the cake base from the bottom, up.
With serrated knife, cut a piece of floral foam to the width of the largest box. Press floral foam onto the cake base.
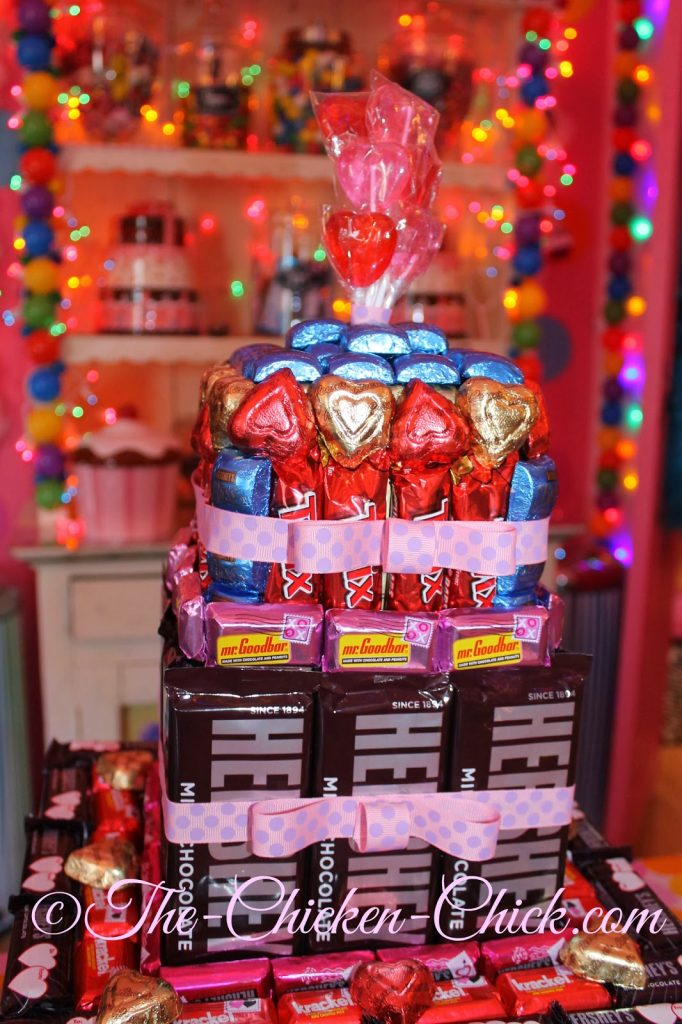
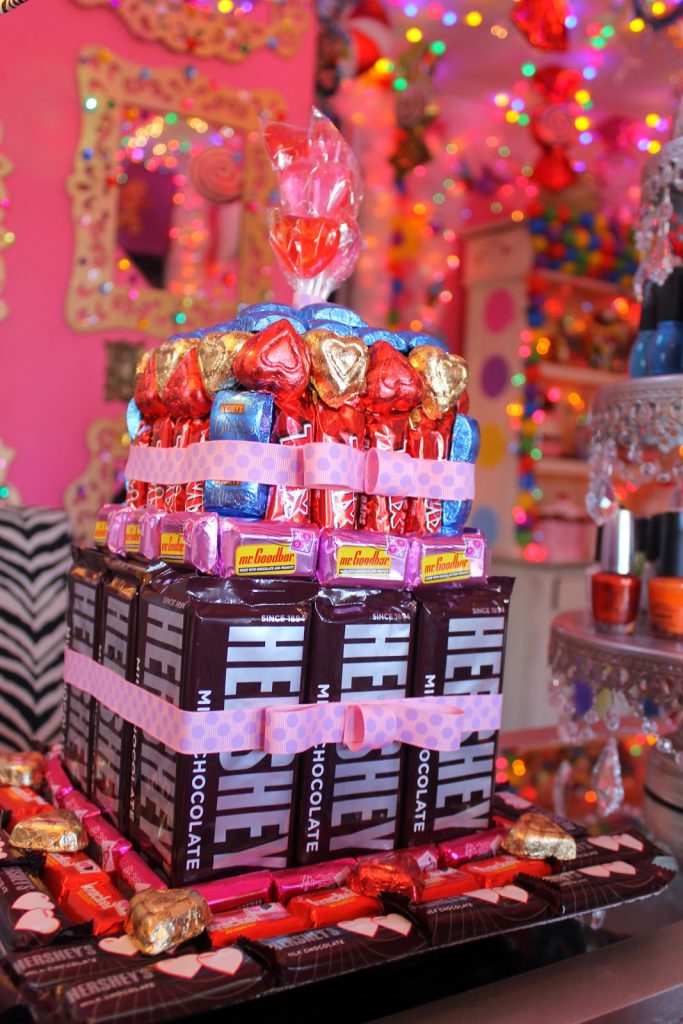
Tape the top box closed on all sides. Leave one side of the bottom box open. Cover the boxes with a decorative paper that you don’t mind seeing in the event part of the box is exposed. I chose a gold Christmas paper.
After boxes are wrapped, place the bottom box on top of the floral foam. This holds the cake firmly in place.
Place some double-stick tape or sticky dots on bottom of top box and press the small box firmly onto the bottom box.

Here’s the fun part! Decide which candy you want to start with and line it up to be sure it fits the area you’d like to cover.
Add double-stick tape or dots to the back of the candy wrapper and press into place. MORE is better- err on the side of too much tape.
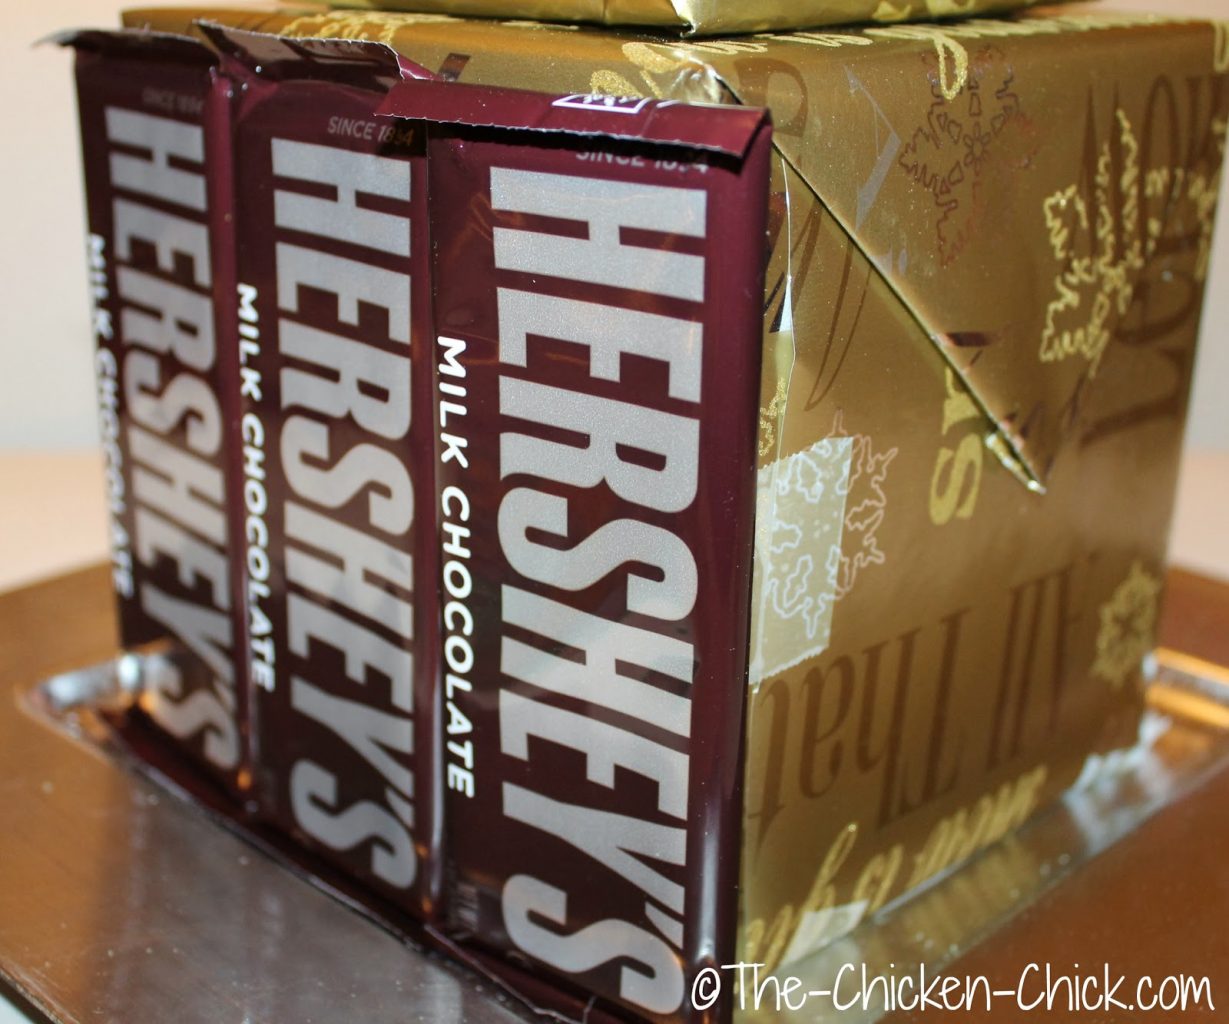
I worked one layer at a time, all the way around the box before moving up to the next level.

When the sides are finished, either run some Washi tape or ribbon around the cake. The tape/ribbon helps to hold the candy in place and adds a fun color contrast.

I originally planned to use the Washi tape, but decided I preferred the ribbon ultimately. Washi tape is easily removed- no harm, no foul.
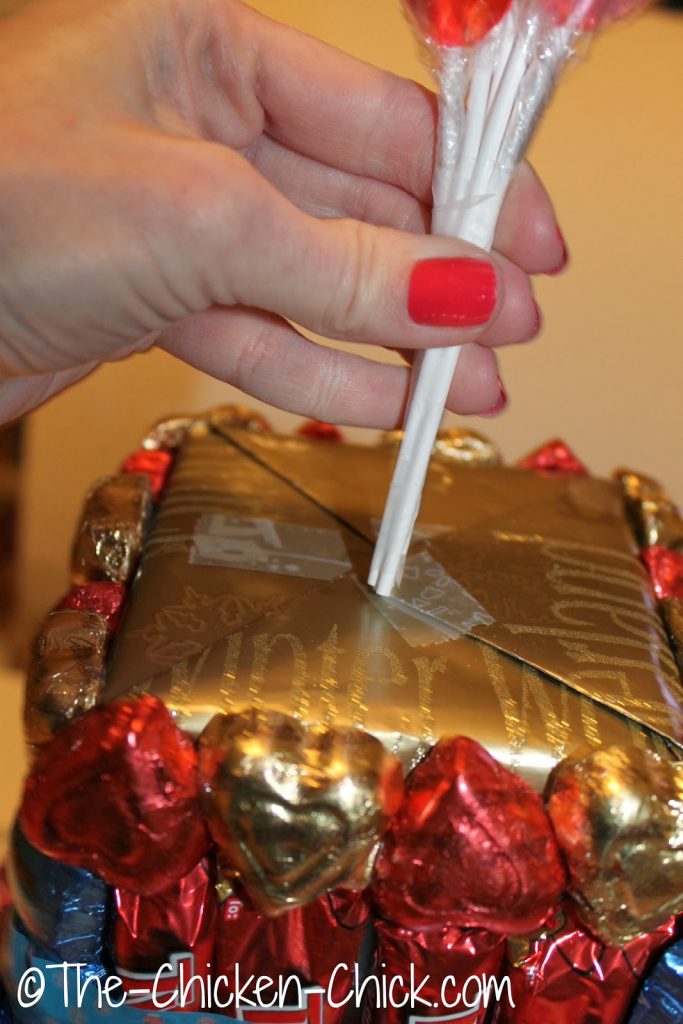
Before adding candy to the top of the cake, poke a small hole in the top of the box for the lollipops. Insert lollipops & wrap lollipop sticks with washi tape or ribbon.
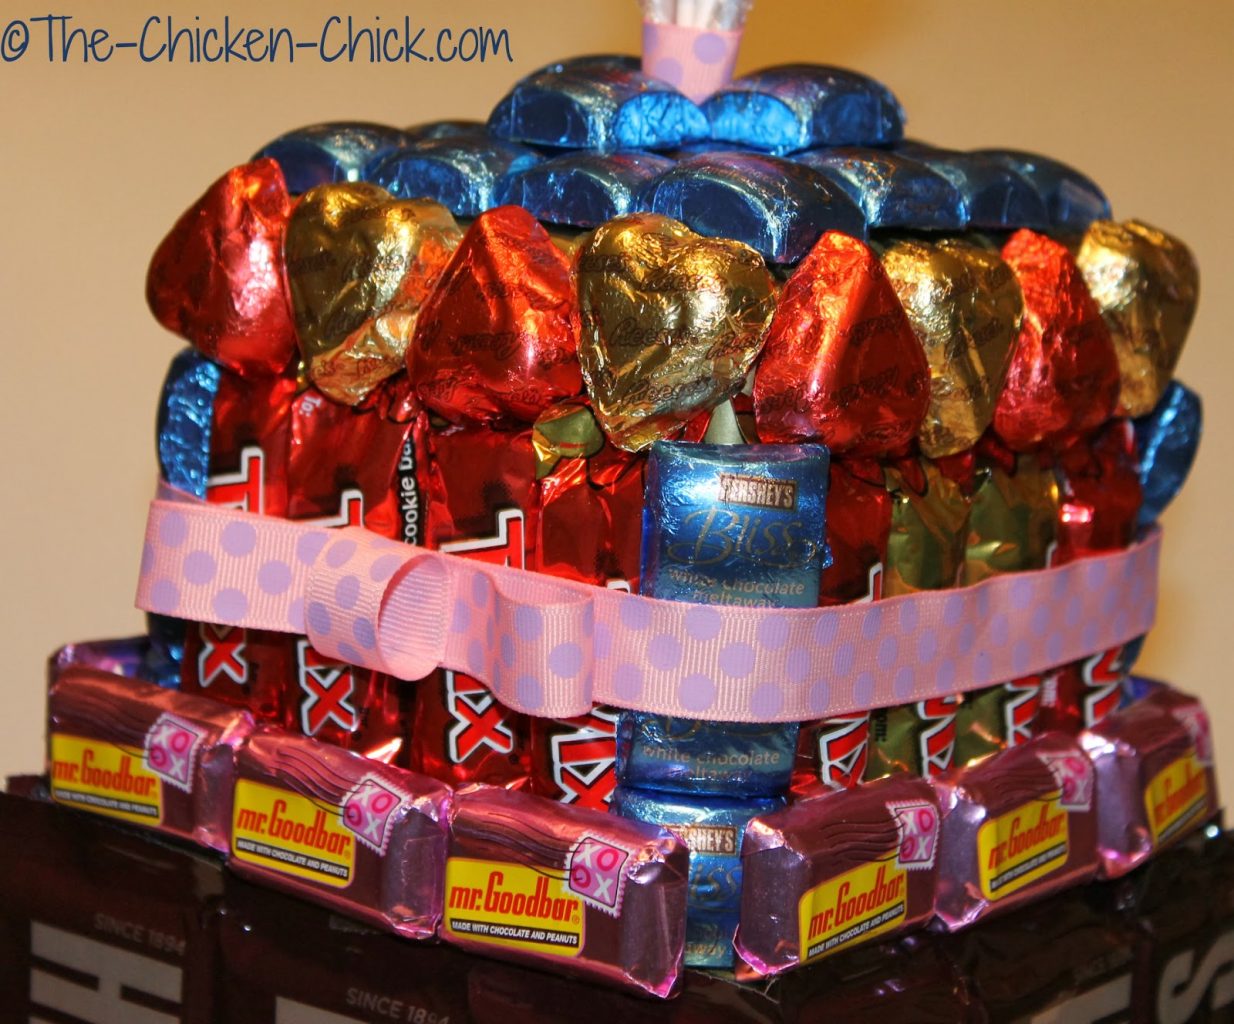
Finish adding chocolate.
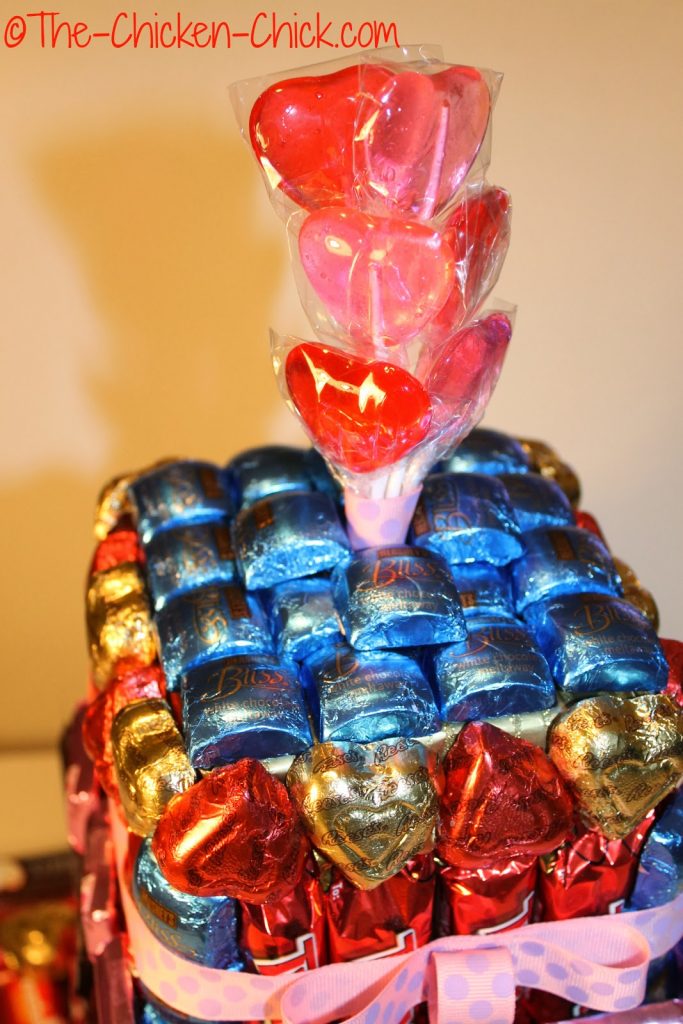
Finish top of cake. I made simple ribbon bows for the front.


Kathy Shea Mormino
Affectionately known internationally as The Chicken Chick®, Kathy Shea Mormino shares a fun-loving, informative style to raising backyard chickens. …Read on


My baby girl turned six this week and we held her party at the most adorable girls’ spa. The girls got cupcake manicures, chocolate facials and princess up-dos, they made lip-gloss, shopped in the gift loft, raided the candy bar and karaoked their little hearts out.
My baby girl. ♥Having held two parties at this spa previously, I was aware of their ‘no outside food’ policy- it’s an insurance/liability thing. Leave it to the lawyers to spoil the fun. I always make my daughters’ birthday cakes, so this policy is a real bummer. The spa ordinarily presents the girls with a candy cake as the birthday song is sung, but it’s a show cake, which is promptly whisked away after the candle is blown out, so this year, I decided to make my baby girl her own candy cake that she would take home.
The assembly took a little more time than anticipated, but it was super fun to make and I’m sure I will make more for celebrations in the future Now that I think of it…they’d make a fun birthday gift for someone too. I let my daughter select all of her favorite candies and then I picked a few of my own. Hey! I didn’t want to run out. Backup is important in a project like this. :) This project can be done very inexpensively with candy from the dollar store or by scaling the size of the cake down.
DIY CANDY CAKE
SUPPLIES NEEDED
2 square boxes, hat boxes or cookie tins, one smaller than the other.
Lots-o-candy, including lollipops for the cake topper.
A base for the cake (eg: a plastic charger, thick cardboard)
wrapping paper
tape, double-sided tape, self-adhesive dots or a cool glue gun
scissors
a chunk of floral foam & large serrated knife
utility knife
a ginormous screw & drill
Washi tape or ribbon
LET’S MAKE IT!
Drill the screw through the cake base from the bottom, up.
With serrated knife, cut a piece of floral foam to the width of the largest box. Press floral foam onto the cake base.
Tape the top box closed on all sides. Leave one side of the bottom box open. Cover the boxes with a decorative paper that you don’t mind seeing in the event part of the box is exposed. I chose a gold Christmas paper.
After boxes are wrapped, place the bottom box on top of the floral foam. This holds the cake firmly in place.
Place some double-stick tape or sticky dots on bottom of top box and press the small box firmly onto the bottom box.
Here’s the fun part! Decide which candy you want to start with and line it up to be sure it fits the area you’d like to cover.
Add double-stick tape or dots to the back of the candy wrapper and press into place. MORE is better- err on the side of too much tape.
I worked one layer at a time, all the way around the box before moving up to the next level.
When the sides are finished, either run some Washi tape or ribbon around the cake. The tape/ribbon helps to hold the candy in place and adds a fun color contrast.
I originally planned to use the Washi tape, but decided I preferred the ribbon ultimately. Washi tape is easily removed- no harm, no foul.
Before adding candy to the top of the cake, poke a small hole in the top of the box for the lollipops. Insert lollipops & wrap lollipop sticks with washi tape or ribbon.
Finish adding chocolate.
Finish top of cake. I made simple ribbon bows for the front.


That’s super cute! What a clever idea! :)
That's super cute! What a clever idea! :)