


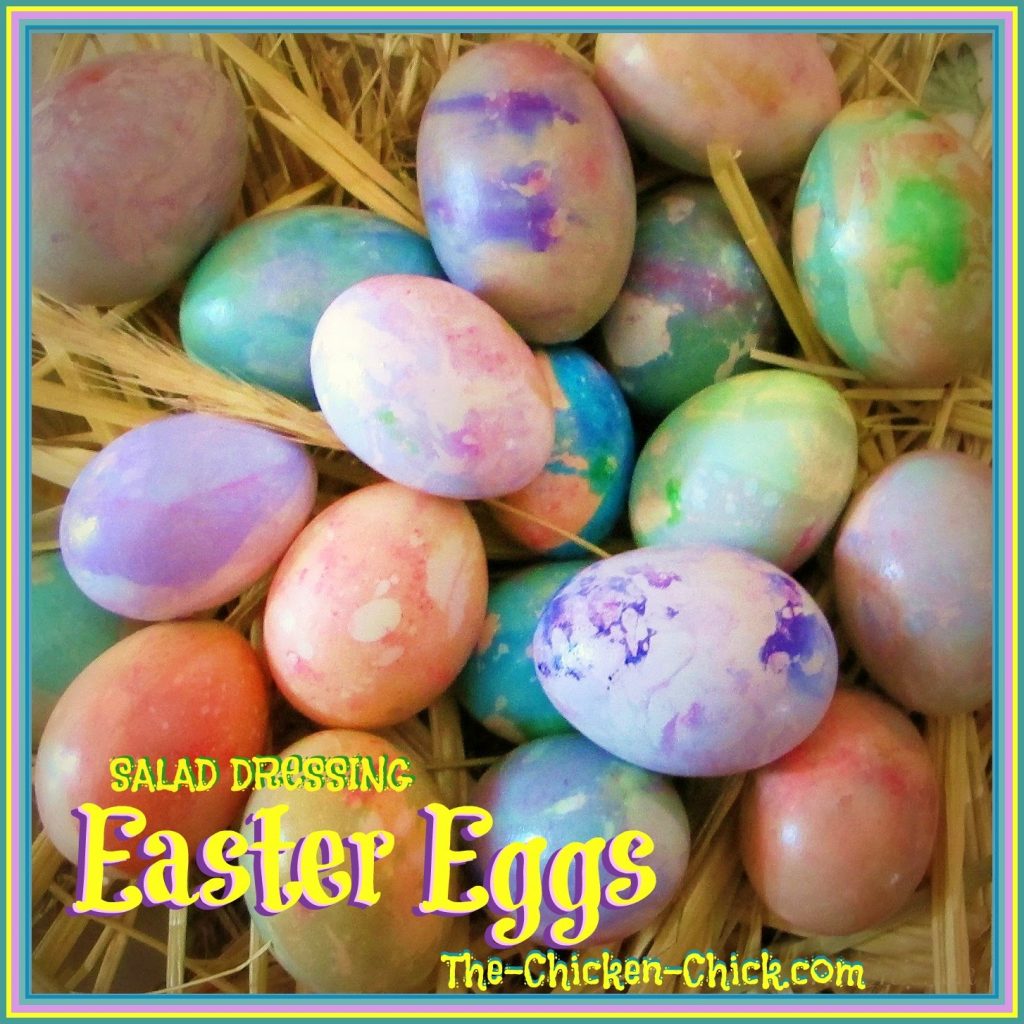
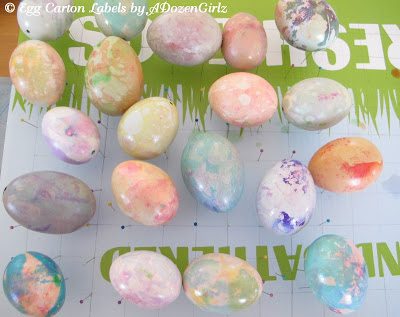
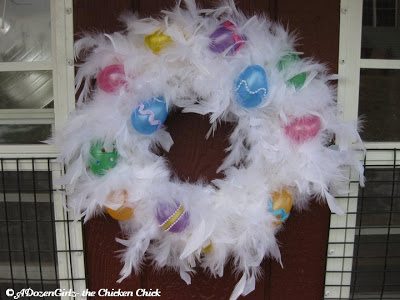
To say that this technique for dying Easter eggs is simple is an understatement. My daughters and I thoroughly enjoyed creating these gorgeous, marbled Easter eggs with basic salad dressing ingredients and food coloring. What follows is my spin on Martha Stewart’s concept.
MS used hard cooked, white eggs and dyed them first in a pale color. I used pre-colored, fresh-from-the-hen eggs in blue, green, white and brown hues, most of which were hand-blown.
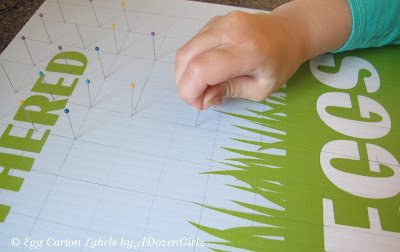
We made MS’s egg-drying rack from foam board and flat-head pins. It worked, but no better than my egg carton/toothpick drying rack, which I’ve used with my blown eggs for years.
SALAD DRESSING EASTER EGGS
INGREDIENTS
2 cups warm water (MS uses 3)
1 tablespoon vinegar
1 tablespoon olive oil
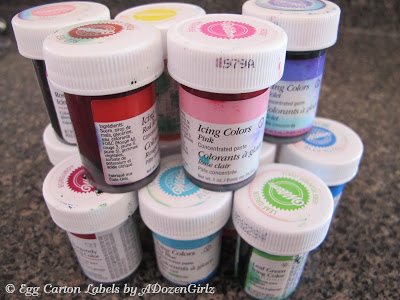
Food coloring (MS uses 15-20 drops of liquid food coloring; I tried the liquid colors but far prefer the results from Wilton icing gel colors)
LET’S MAKE IT!
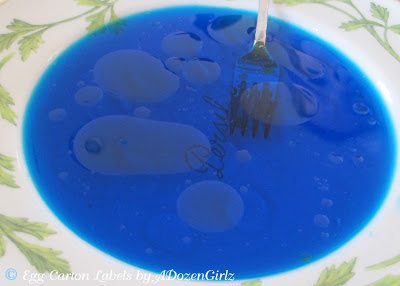
In shallow dishes, add the salad dressing ingredients, gently and briefly swirling a fork through it. I found that the best effects were achieved when undissolved particles of the gel coloring remain on the bottom and edges of the bowl.
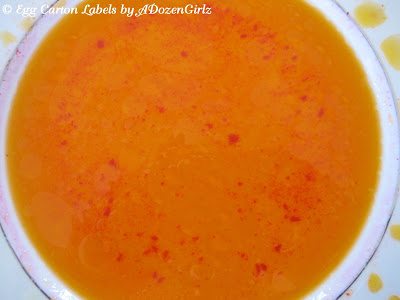
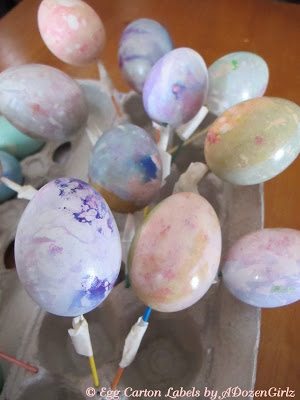
Briefly roll an egg in the salad dressing, remove and dry with a paper towel. Roll or dip in additional colors if desired.
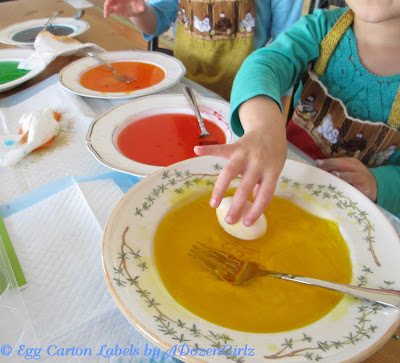
This technique was simple enough for my 4 year old to master.
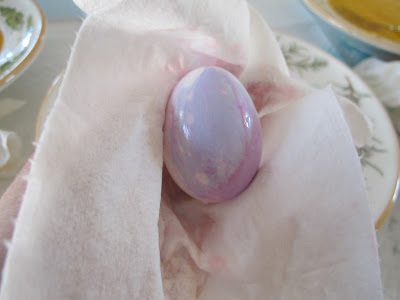
Dry with paper towel.
Hard cooked eggs do not require additional drying after wiping off with the paper towel, but the inside of a blown egg will.
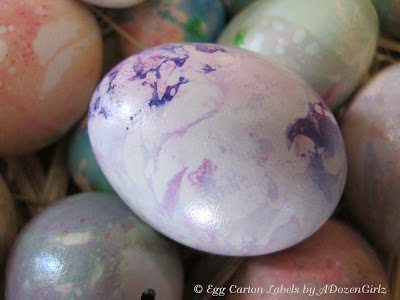
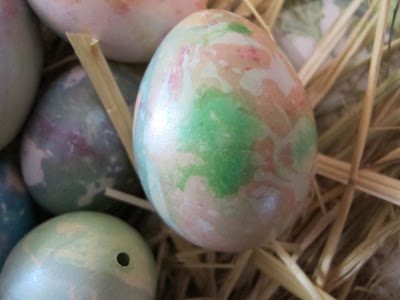
The eggs retain a glossy sheen from the oil.
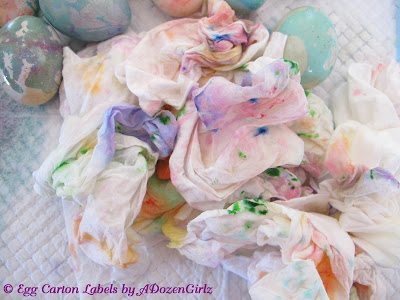
Even the mess at the end was beautiful!
Happy Easter from my peeps to yours!

Kathy Shea Mormino
Affectionately known internationally as The Chicken Chick®, Kathy Shea Mormino shares a fun-loving, informative style to raising backyard chickens. …Read on


shop my SPONSORS


To say that this technique for dying Easter eggs is simple is an understatement. My daughters and I thoroughly enjoyed creating these gorgeous, marbled Easter eggs with basic salad dressing ingredients and food coloring. What follows is my spin on Martha Stewart’s concept.
MS used hard cooked, white eggs and dyed them first in a pale color. I used pre-colored, fresh-from-the-hen eggs in blue, green, white and brown hues, most of which were hand-blown.
We made MS’s egg-drying rack from foam board and flat-head pins. It worked, but no better than my egg carton/toothpick drying rack, which I’ve used with my blown eggs for years.
SALAD DRESSING EASTER EGGS
INGREDIENTS
2 cups warm water (MS uses 3)
1 tablespoon vinegar
1 tablespoon olive oil
Food coloring (MS uses 15-20 drops of liquid food coloring; I tried the liquid colors but far prefer the results from Wilton icing gel colors)
LET’S MAKE IT!
In shallow dishes, add the salad dressing ingredients, gently and briefly swirling a fork through it. I found that the best effects were achieved when undissolved particles of the gel coloring remain on the bottom and edges of the bowl.
Briefly roll an egg in the salad dressing, remove and dry with a paper towel. Roll or dip in additional colors if desired.
This technique was simple enough for my 4 year old to master.
Dry with paper towel.
Hard cooked eggs do not require additional drying after wiping off with the paper towel, but the inside of a blown egg will.
The eggs retain a glossy sheen from the oil.
Even the mess at the end was beautiful!
Happy Easter from my peeps to yours!


What a fantastic idea! So simple and they turn out so great! Pinning this for next year! :) You are a Featured Favorite on Saturday Show & Tell at Cheerios and Lattes this week, thanks for joining us last week, we love having you! Can't wait to see what you've been up to this week!
Mackenzie :)
Very sweet, Paula. Let's talk about when you're going to get your daughter her own flock! :D
I'm so glad you linked up for WW so I could find you! My 9 year old daughter absolutely loves chickens. Our neighbors have some that visit our yard and she talks to them, feeds them, holds them, and sometimes even gets them to sit in the chair next to her. Some call her the Chicken Whisperer lol.
Paula
lifeasweknowitbypaula.blogspot.com
Your being featured tomorrow with this post! Come by & grab your featured button & link up again this week if you like! Thanks for joining in & sharing how easy it is to marble eggs. (Happy Easter btw)
I'm linked up Chelsea, thanks for the invite!!