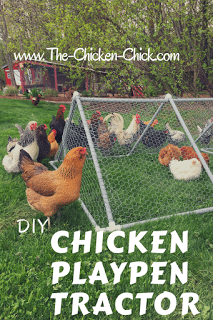
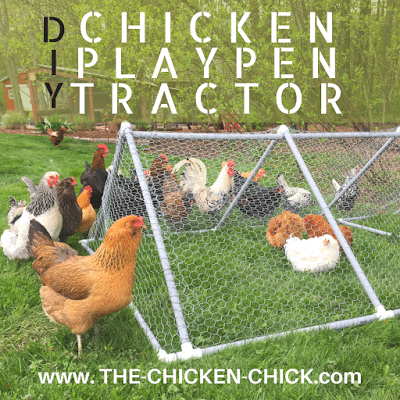
There are times in every flock when one or more chicken needs to be kept physically separated from the others in the yard, in which cases, a lightweight chicken playpen tractor comes in handy to provide continued visibility to the flock while protecting the bird(s) from each other. A playpen tractor is useful when new chickens are being integrated into an existing flock, when a bird bully needs to be removed for others’ safety, when a minor injury requires being kept in protective custody, or when feather loss from over-mating or picking warrants being provided with a safe zone. It can also be used to confine growing chicks during a field trip in the yard on warm day. Such times do not include when birds are sick or in quarantine.
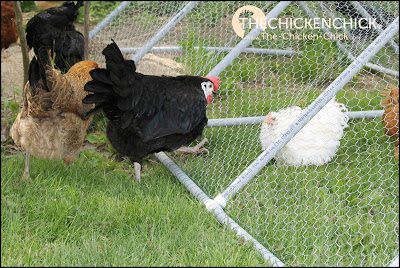
A playpen tractor is a temporary, daytime confinement facility located in the chicken yard. It is not predator-proof and is not intended to house chickens at night. It is spacious, lightweight and easy for one person to move alone without the added weight of wheels, but not so lightweight that it could blow over in the wind. The instructions for this playpen tractor are provided courtesy of Mr. Chicken Chick who built it at my request for three bantam Cochin teenagers being integrated into the flock. This was a figure-it-out-as-you-go project. (don’t judge) A portion of the construction was filmed live on Facebook and can be seen HERE.
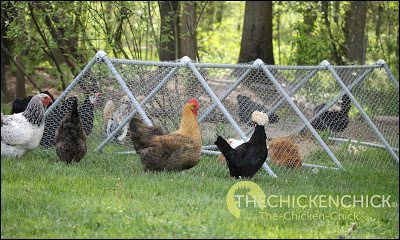
NOTES: Chickens should always have access to water, feed, and shade in the playpen tractor. Either locate part of the playpen tractor in a shady spot or attach a piece of shade cloth or tarp to a portion of it. Bonus points if you can arrange for a dust bath inside!
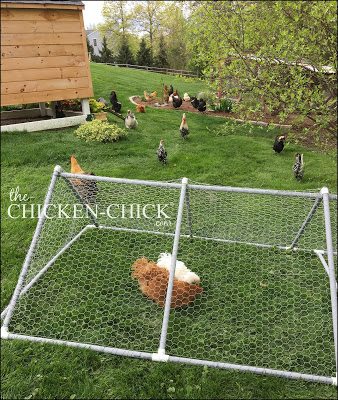
The lack of a door was intentional as it would serve no purpose. The tractor is easily tipped up on its side for access.
PLAYPEN TRACTOR SPECS
4.5 ft wide x 10 ft, 11” long
SUPPLIES NEEDED
(8) 3/4in. x 10 ft. Schedule 40 PVC electrical conduit
(9) 3/4in. Schedule 40 PVC 90-degree elbow connectors
(12) 3/4in. Schedule 40 PVC tee connectors
One roll of chicken wire (3 ft x 50 ft)
PVC cement
22 gauge wire (or zip ties to attach the chicken wire to the tractor frame)
(5) 1/4″ x 3 1/2″ galvanized carriage bolts with nuts
TOOLS
Tape measure & marker
Saw or PVC pipe cutter
Tin snips (to cut chicken wire)
Drill with 3/8″ bit
Adjustable wrench (for bolts & nuts)
LET’S BUILD IT!
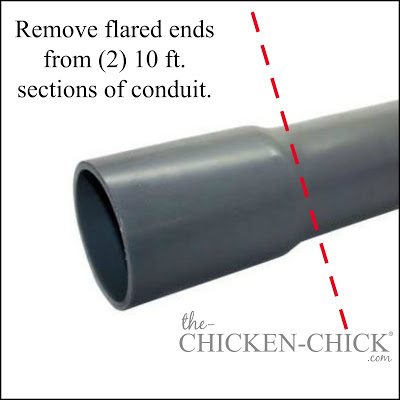
BOTTOM SIDES: With saw or pipe cutter, remove the flared ends from each of (2) pieces of 10 ft conduit. (the cuts should be equal in length) Loosely attach a tee connector to each of the 4 ends, orienting the remaining opening of each tee connector up at a 45° angle. Position pieces on the ground parallel to each other.
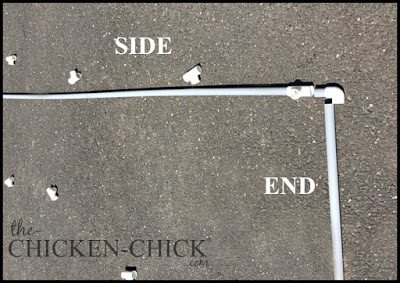
BOTTOM ENDS: Measure and cut (2), 54” pieces of conduit. Position them on the ground, perpendicular to the bottom side pieces.
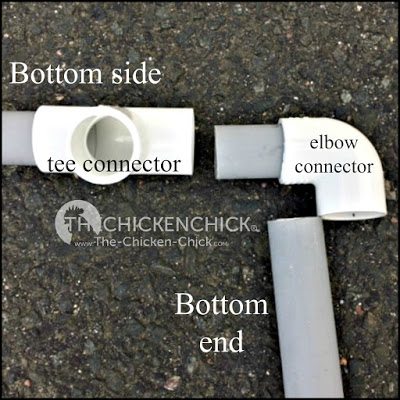
CREATE BOTTOM CORNERS and COMPLETE THE FRAME: Cut (4), 2″ pieces of conduit. Loosely attach an elbow connector to one end of each 2″ piece. Now loosely join each elbow connector to an end conduit piece and a side tee connector to complete the frame.
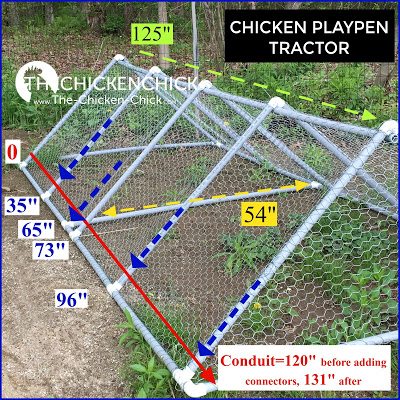
Measure, mark and cut each base conduit piece as follows: at 35”, 65”, 73” and 96”. Install a T-connector at each cut location. (see blue arrows in photo below) Orient the openings of the tee connectors at the 35, 65, 96” marks towards top of A-frame at 45° angles.
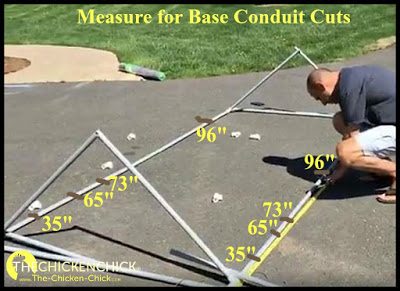

CREATE BOTTOM CENTER SUPPORT: Cut (1), 54″ segment of conduit. Loosely attach it to the base to the tee connectors at the 73” marks. (see yellow arrows in photo above)
CREATE A-FRAME WALLS: Cut (10), 37” pieces of conduit. Loosely attach each piece to a base tee connector. Join conduit pieces on opposing sides of frame with elbow connectors.
GLUE CONNECTIONS: secure all conduit pieces to connectors with PVC cement following instructions on cement can.
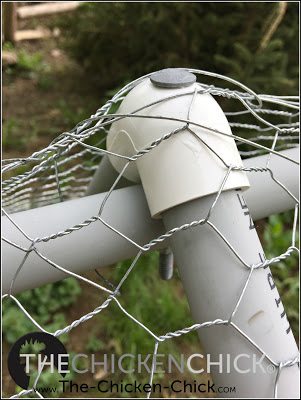
PREP TOP OF A-FRAME: Drill a 3/8″ hole vertically down through each PVC elbow at the 5 frame peaks. (this pic gets a little ahead of the instructions, but you can see where we’re headed)
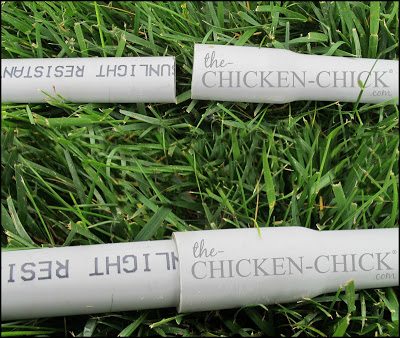
CREATE PEAK SUPPORT CONDUIT: Cut (1), 5” segment of conduit. Apply PVC cement to the outside of the 5” segment and insert into the flared end of a 10 ft piece of conduit.
Align peak support conduit underneath A-frame elbows. Suspend conduit in place with wire.
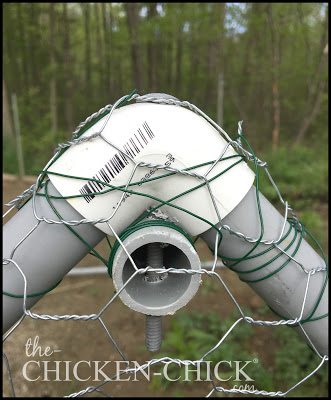
Using the existing holes in PVC elbows (from step 9) as a guide, drill straight down through conduit.
Insert bolts through drilled holes and secure with nuts.
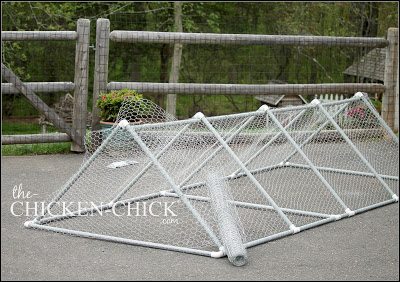
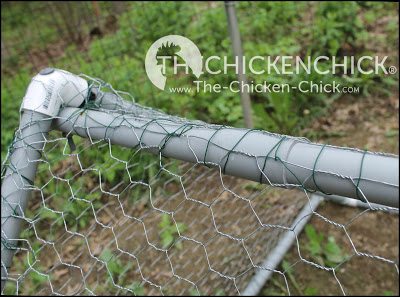
ADD CHICKEN WIRE: Roll out chicken wire along each side of frame and cut to fit using tin snips. Attach chicken wire to each conduit by threading wire through and around both. Bend back all sharp ends of chicken wire.

Kathy Shea Mormino
Affectionately known internationally as The Chicken Chick®, Kathy Shea Mormino shares a fun-loving, informative style to raising backyard chickens. …Read on


shop my SPONSORS
There are times in every flock when one or more chicken needs to be kept physically separated from the others in the yard, in which cases, a lightweight chicken playpen tractor comes in handy to provide continued visibility to the flock while protecting the bird(s) from each other. A playpen tractor is useful when new chickens are being integrated into an existing flock, when a bird bully needs to be removed for others’ safety, when a minor injury requires being kept in protective custody, or when feather loss from over-mating or picking warrants being provided with a safe zone. It can also be used to confine growing chicks during a field trip in the yard on warm day. Such times do not include when birds are sick or in quarantine.

A playpen tractor is a temporary, daytime confinement facility located in the chicken yard. It is not predator-proof and is not intended to house chickens at night. It is spacious, lightweight and easy for one person to move alone without the added weight of wheels, but not so lightweight that it could blow over in the wind. The instructions for this playpen tractor are provided courtesy of Mr. Chicken Chick who built it at my request for three bantam Cochin teenagers being integrated into the flock. This was a figure-it-out-as-you-go project. (don’t judge) A portion of the construction was filmed live on Facebook and can be seen HERE.

NOTES: Chickens should always have access to water, feed, and shade in the playpen tractor. Either locate part of the playpen tractor in a shady spot or attach a piece of shade cloth or tarp to a portion of it. Bonus points if you can arrange for a dust bath inside!
The lack of a door was intentional as it would serve no purpose. The tractor is easily tipped up on its side for access.


PLAYPEN TRACTOR SPECS
4.5 ft wide x 10 ft, 11” long
SUPPLIES NEEDED
(8) 3/4in. x 10 ft. Schedule 40 PVC electrical conduit
(9) 3/4in. Schedule 40 PVC 90-degree elbow connectors
(12) 3/4in. Schedule 40 PVC tee connectors
One roll of chicken wire (3 ft x 50 ft)
PVC cement
22 gauge wire (or zip ties to attach the chicken wire to the tractor frame)
(5) 1/4″ x 3 1/2″ galvanized carriage bolts with nuts
TOOLS
Tape measure & marker
Saw or PVC pipe cutter
Tin snips (to cut chicken wire)
Drill with 3/8″ bit
Adjustable wrench (for bolts & nuts)
LET’S BUILD IT!
BOTTOM SIDES: With saw or pipe cutter, remove the flared ends from each of (2) pieces of 10 ft conduit. (the cuts should be equal in length) Loosely attach a tee connector to each of the 4 ends, orienting the remaining opening of each tee connector up at a 45° angle. Position pieces on the ground parallel to each other.

BOTTOM ENDS: Measure and cut (2), 54” pieces of conduit. Position them on the ground, perpendicular to the bottom side pieces.
CREATE BOTTOM CORNERS and COMPLETE THE FRAME: Cut (4), 2″ pieces of conduit. Loosely attach an elbow connector to one end of each 2″ piece. Now loosely join each elbow connector to an end conduit piece and a side tee connector to complete the frame.


Measure, mark and cut each base conduit piece as follows: at 35”, 65”, 73” and 96”. Install a T-connector at each cut location. (see blue arrows in photo below) Orient the openings of the tee connectors at the 35, 65, 96” marks towards top of A-frame at 45° angles.


CREATE BOTTOM CENTER SUPPORT: Cut (1), 54″ segment of conduit. Loosely attach it to the base to the tee connectors at the 73” marks. (see yellow arrows in photo above)
CREATE A-FRAME WALLS: Cut (10), 37” pieces of conduit. Loosely attach each piece to a base tee connector. Join conduit pieces on opposing sides of frame with elbow connectors.
GLUE CONNECTIONS: secure all conduit pieces to connectors with PVC cement following instructions on cement can.
PREP TOP OF A-FRAME: Drill a 3/8″ hole vertically down through each PVC elbow at the 5 frame peaks. (this pic gets a little ahead of the instructions, but you can see where we’re headed)

CREATE PEAK SUPPORT CONDUIT: Cut (1), 5” segment of conduit. Apply PVC cement to the outside of the 5” segment and insert into the flared end of a 10 ft piece of conduit.

Align peak support conduit underneath A-frame elbows. Suspend conduit in place with wire.
Using the existing holes in PVC elbows (from step 9) as a guide, drill straight down through conduit.
Insert bolts through drilled holes and secure with nuts.

ADD CHICKEN WIRE: Roll out chicken wire along each side of frame and cut to fit using tin snips. Attach chicken wire to each conduit by threading wire through and around both. Bend back all sharp ends of chicken wire.












Mr Chicken Chick, you’re awesome for making the tractor for your wife. I love this blog. I’ve learned alot.
I am a new chicken Mom. Just got my peeps in February. I had no idea how much fun they would be. I am learning so much from your web site and it is my first go to resource for questions that pop up. Thank you so much!
We just started our little chicken family and I’ve found so much great info on your blog! Thank you so much!
these blogs are great. You have the best info around
would love to win the chicken fountain. Love reading your blog