


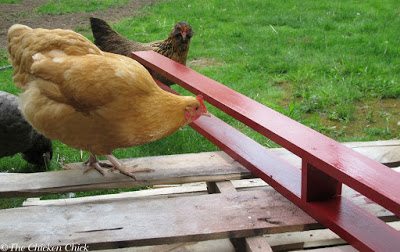
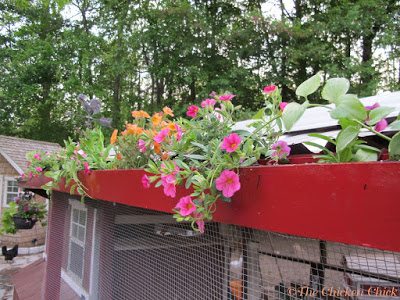
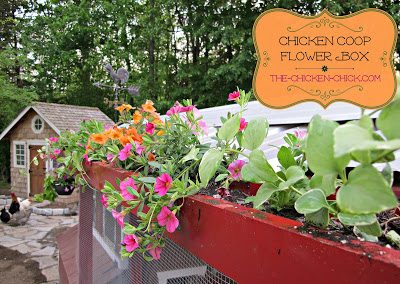
After having recently remodeled the front of our chicken run, I felt we needed to add some interest to it and, on a whim, put my husband to work making a flower box. The beauty of this micro flower garden is that the chickens can neither eat them nor trample it! Using spare wood from a previous project, he whipped up this flower box in less than a half an hour (paint drying time not included)
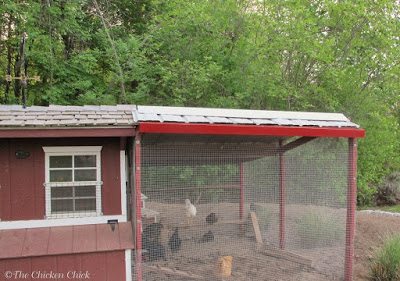
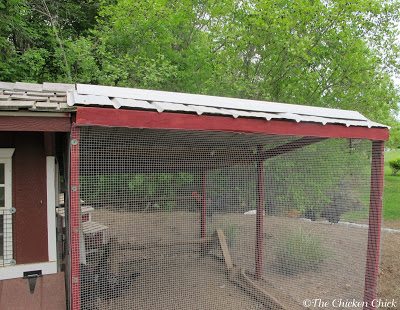 The front of my run, before flower box installation.
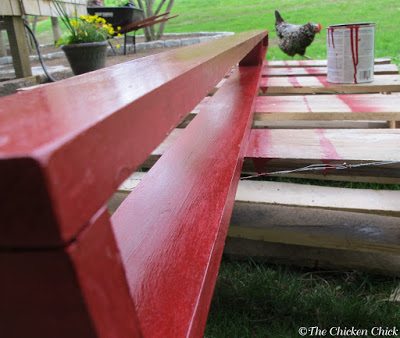
The top piece of the run measures 90 inches, so two pieces of wood were cut to 90 inches. The 2 ends and middle support were cut to 3 inches each. The wood was painted with paint we had on-hand and the five pieces were then screwed together.
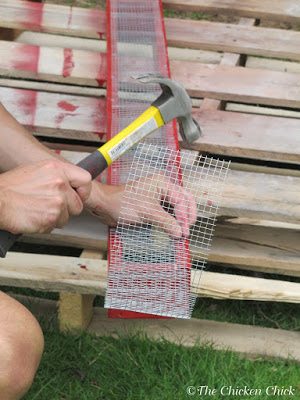
After assembling the box, 1/4 inch hardware cloth was nailed to the bottom. I thought this would make the flower box lighter and allow for excellent drainage
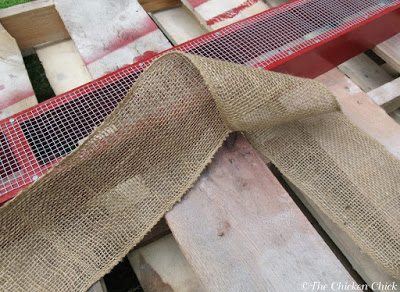
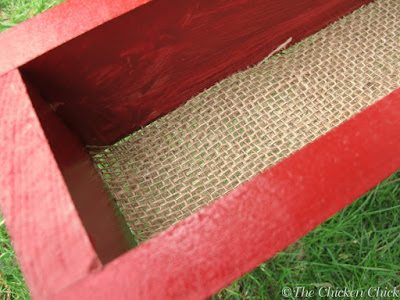
The bottom of the flower box was lined with burlap to keep the soil from washing through the hardware cloth when watered.
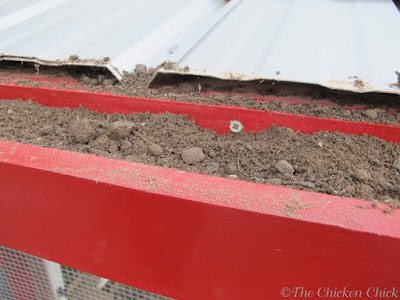
Once lined with burlap, the box was screwed to the front of the run
I added some potting soil and compost, courtesy of my feathered pets, and then planted vinca vines and some petunias.

Kathy Shea Mormino
Affectionately known internationally as The Chicken Chick®, Kathy Shea Mormino shares a fun-loving, informative style to raising backyard chickens. …Read on


shop my SPONSORS


After having recently remodeled the front of our chicken run, I felt we needed to add some interest to it and, on a whim, put my husband to work making a flower box. The beauty of this micro flower garden is that the chickens can neither eat them nor trample it! Using spare wood from a previous project, he whipped up this flower box in less than a half an hour (paint drying time not included)
The front of my run, before flower box installation.
The top piece of the run measures 90 inches, so two pieces of wood were cut to 90 inches. The 2 ends and middle support were cut to 3 inches each. The wood was painted with paint we had on-hand and the five pieces were then screwed together.
After assembling the box, 1/4 inch hardware cloth was nailed to the bottom. I thought this would make the flower box lighter and allow for excellent drainage
The bottom of the flower box was lined with burlap to keep the soil from washing through the hardware cloth when watered.
Once lined with burlap, the box was screwed to the front of the run
I added some potting soil and compost, courtesy of my feathered pets, and then planted vinca vines and some petunias.


Cool! Do share a photo with me on Facebook, I'd love to see it, Susan!
Just finishing our coop and had my husband add a planter box under the window!
This is a great idea. We have finished our coop and were looking at ideas for final touches!
What a sweet idea, Kathy! Love it!!!! :)
xoxo laurie @ heavens-walk
I have some chickens that fly as high as your flower box. I used to clip one wing and I may need to do that again. LOL