


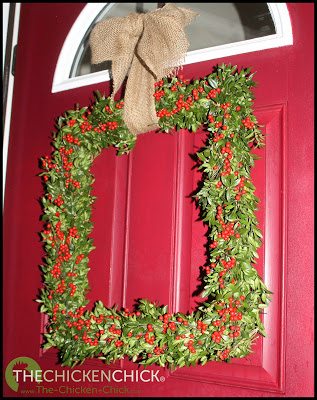
Checking this project off the ol’ Craft Bucket List! Sourcing the boxwood cuttings were always the challenge and I guess I never looked hard enough for them, so when a friend in town- who happens to be a landscape gardener and designer- offered me her spare cuttings, I jumped at the chance to get my craft on! It was a super easy project and so rewarding to see the fresh greens liven up the front door this holiday season. Ready to learn how it’s done? Let’s go!
SQUARE BOXWOOD WREATH
SUPPLIES NEEDED
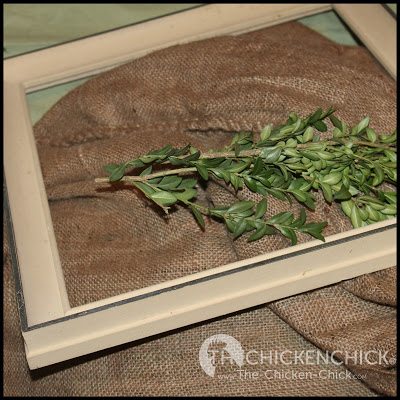
An empty wood frame
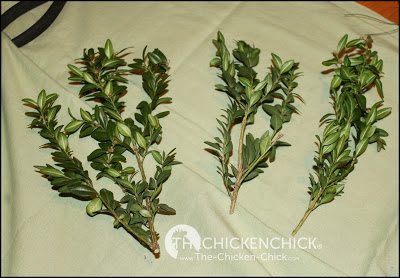
Boxwood cuttings trimmed to approx. 5″ stems
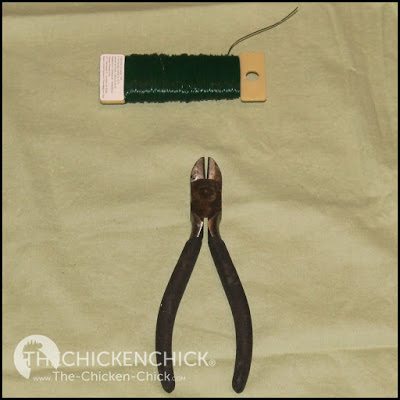
2 paddles of 22 gauge floral wire
Wire cutters
Real or artificial berries on stems
2.5″ wired burlap ribbon
LET’S MAKE IT!
Using wire paddle #1, pre-cut 15-20 pieces of wire & keep in a pile nearby.
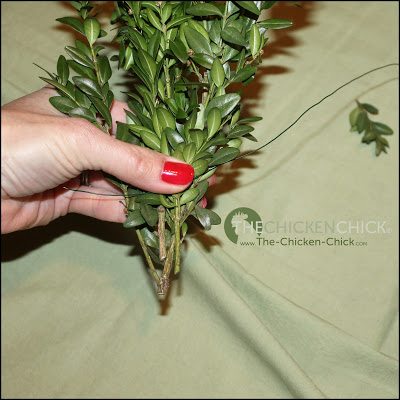
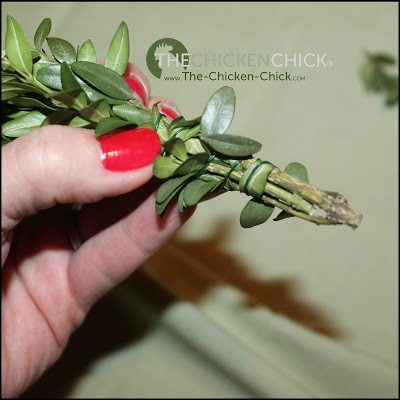
Grab three stems of the trimmed boxwood & stack one on top of the other-
tallest in the back, shortest in the front.
Using one piece of cut wire, securely wrap the bottom few inches of the boxwood stems together in a spiral working towards the bottom. Tuck ends into the bunch.
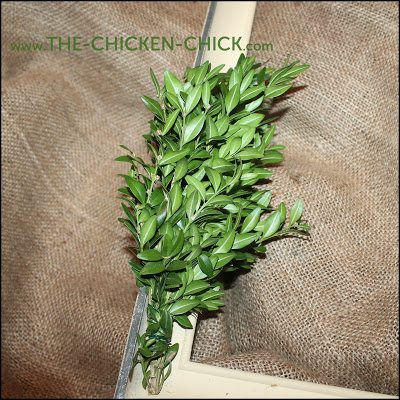
Prep 10-12 bunches and set aside until ready to add to frame.
NOTES: Adding more stems to each bunch will make a thicker wreath.
Either wire berry stems at this point or after wreath is assembled as I did.
I used non-wired burlap ribbon because that’s what I had on-hand. If you want a more structured looking bow, use wired ribbon.
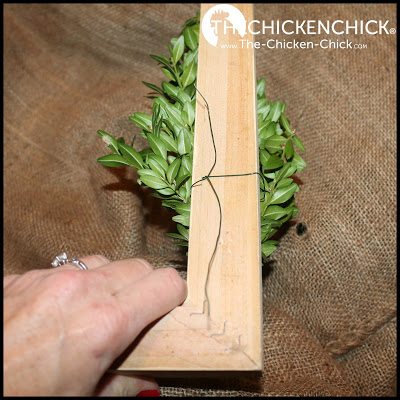
Beginning in one corner of the frame, lay one boxwood bunch on top of frame using wire paddle #2. (Pay NO attention to the fact that I did not follow my own instructions in the following photo)
Wire paddle #2 will NOT be cut until the last stem is attached to frame.
Beginning approximately in the middle of the bunch, wrap wire around both the frame & boxwood a few times ending approximately 1″ from the bottom of the stem.
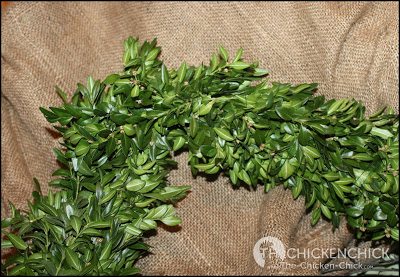
Overlap second bunch on top of first bunch with stems pointing in the same direction. Wire second bunch around the frame.
Repeat process until the frame is completely covered, tucking last bunch underneath first bunch & wire them together. Any bald spots that allow the frame to be seen can be covered easily by tucking boxwood stems into the existing bunches.
Tuck berry stems into boxwood bunches. Tie ribbon loosely around frame. Wire a loop around top of ribbon for hanging.

Order your copy of my bestselling book
The Chicken Chick’s Guide to Backyard Chickens

Kathy Shea Mormino
Affectionately known internationally as The Chicken Chick®, Kathy Shea Mormino shares a fun-loving, informative style to raising backyard chickens. …Read on


shop my SPONSORS


Checking this project off the ol’ Craft Bucket List! Sourcing the boxwood cuttings were always the challenge and I guess I never looked hard enough for them, so when a friend in town- who happens to be a landscape gardener and designer- offered me her spare cuttings, I jumped at the chance to get my craft on! It was a super easy project and so rewarding to see the fresh greens liven up the front door this holiday season. Ready to learn how it’s done? Let’s go!
SQUARE BOXWOOD WREATH
SUPPLIES NEEDED
An empty wood frame
Boxwood cuttings trimmed to approx. 5″ stems
2 paddles of 22 gauge floral wire
Wire cutters
Real or artificial berries on stems
2.5″ wired burlap ribbon
LET’S MAKE IT!
Using wire paddle #1, pre-cut 15-20 pieces of wire & keep in a pile nearby.
Grab three stems of the trimmed boxwood & stack one on top of the other-
tallest in the back, shortest in the front.
Using one piece of cut wire, securely wrap the bottom few inches of the boxwood stems together in a spiral working towards the bottom. Tuck ends into the bunch.
Prep 10-12 bunches and set aside until ready to add to frame.
NOTES: Adding more stems to each bunch will make a thicker wreath.
Either wire berry stems at this point or after wreath is assembled as I did.
I used non-wired burlap ribbon because that’s what I had on-hand. If you want a more structured looking bow, use wired ribbon.
Beginning in one corner of the frame, lay one boxwood bunch on top of frame using wire paddle #2. (Pay NO attention to the fact that I did not follow my own instructions in the following photo)
Wire paddle #2 will NOT be cut until the last stem is attached to frame.
Beginning approximately in the middle of the bunch, wrap wire around both the frame & boxwood a few times ending approximately 1″ from the bottom of the stem.
Overlap second bunch on top of first bunch with stems pointing in the same direction. Wire second bunch around the frame.
Repeat process until the frame is completely covered, tucking last bunch underneath first bunch & wire them together. Any bald spots that allow the frame to be seen can be covered easily by tucking boxwood stems into the existing bunches.
Tuck berry stems into boxwood bunches. Tie ribbon loosely around frame. Wire a loop around top of ribbon for hanging.
Order your copy of my bestselling book


Merry Christmas everyone :)
Would love some grubs for my girls! Or should I say I would love some grubs to give my girls so my rooster can take credit for finding them.
Sounds like a great treat for my chickens. Thank you for the opportunity to try for these for my hens.
chickens say yum!
The girls would love this gift from Santa Scratch and Peck!